
Using Extended Weather Blueprints
I'm going to refer to the Extended Weather Blueprint that is supplied with Pacific Surfliner in this example, so if you have that route then enable its assets for the scenario (the same way you would if you wanted to use a loco from that pack). If you don't have Pacific Surfliner then you will likely have to skip to the next section about creating your own Extended Weather Blueprint.
In order to use this Extended Weather Blueprint, having enabled it, we must then tell the scenario specifically to use it. You can only point a scenario to one single Extended Weather Blueprint.
When you first edit a scenario you can see the scenario properties (such as title, time of day, season etc) on the top right fly-out. At the top of this, you will see a picture which looks like some gears, this is the option that takes you to more advanced settings, click it.

This shows the next "tab" - to return to the normal one, click the orange train icon.
From this tab you can use the drop-down box to select from the available Extended Weather Blueprints - in this case, I'm seeing the two that Pacific Surfliner contains.

Within an Extended Weather Blueprint there are defined a number of "Chains" which define a sequence of weather patterns to apply, each Chain has a name, and it is this chain that the LUA script must activate.
There are three weather chains defined in the Pacific Surfliner weather pattern:
- FirstChain
- SecondChain
- FinalStorm
Within our LUA script we simply need to tell the game to start one of these sequences, as follows:
SysCall ( "WeatherController:SetCurrentWeatherEventChain", "FirstChain");
This will cause the weather sequence defined by this chain to immediately start executing, this could cause fog to change, the sky colour to change, rain to start or change intensity, flashes in the sky, it can even place textures in the world to act as lightning bolts or rainbows.
Creating Extended Weather Blueprints
To create these blueprints you will need to set up a source folder for your assets if you do not already have one. Within the Train Simulator 2015 home directory, you need to create a Source folder along with another folder for the "Provider" name and another for the "Product" name. For example, Provider might be your name or some handle you go by online. Product could just be "ScenarioAssets". Beneath there, create a Weather folder, and inside that create an Audio folder.
When you're done, it should look like this:

Note I've used "MattPeddlesden" as my "Provider" and "ScenarioSupport" as my "Product". If you're building this as part of a bigger pre-existing route or loco pack then you can of course just drop these assets right in there rather than creating something new.
From the RailWorks home directory, run BlueprintEditor2.exe and you will see something similar to this:

From here, we can start creating the blueprint.
Right click on the "Weather" folder, select "Add" and then "New Item".
From the dialog that pops up:

Select "Blueprint" then "Weather pattern extension blueprint" and enter a sensible name for the file, it must end with ".xml". Click OK.
It will now load the blank blueprint in ready for you to edit it.
The blueprint is split in to a number of sections. Before we go any further, enter something in to the "Display Name" field. I've entered "MyCustomWeatherPattern".

As with any design process, the first place to start is with a pencil and paper. What do we want this to do? We can set up weather chains that do multiple things one after the other, or we can split them out in to their own chains and call them up as we want. For this tutorial, let's make it four separate chains that each do one thing. I'll leave it to you to get creative!
Chain 1 "Rain" - Light rain
Chain 2 "Foggy Rain" - Step 2: Light rain + Close fog
Chain 3 "Foggy Downpour" - Step 3: Heavy rain + Close fog
If you want things to happen in specific locations (e.g. start raining just at the time when you have the heaviest load on the steepest track perhaps!) then set up chains that you can start at specific locations via triggered events. If you want sequences that happen over a period of fixed time, you can set up chains to do multiple things in sequence and then simply trigger it at an appropriate point in the script, so you really do have a lot of flexibility.
We need to attack this problem by breaking it down in to component parts defined by the blueprint, which means we need to define the clouds and the precipitation separately, then tie them together in a "weather type" (which adds more options on top) and then assemble chains that the LUA script can call.
Clouds

Set the name to something appropriate, we're going to just call this one "thick clouds".
When a route is set up, the route designer will set up four different sky dome textures and using the values in "Cloud Description" you can choose which ones will be shown by setting them to 1 or 0.
The Colour Darkening Intensity allows you to make noticeable changes to the ambient lighting, particularly useful during a heavy storm where you might want to set it to 1.5 or even 2, at this point headlights become more visible and can provide a much more noticeable environmental change.
My example weather blueprint i've set up three cloud types:

"Thick Clouds" will be our normal sky, we'll then change to "Storm Clouds" for when it's raining, which will also dark the world, and then "Dark Storm Clouds" for when the rain really kicks in to high gear.
Precipitation
Precipitation will let you set up a number of different things including the textures for the rain drops, snow flakes, or whatever else you want to fall from the sky. It is only an ALPHA texture however so I think you'll have problems trying to make cats and dogs actually fall from the sky! You will need to create a small texture for the rain drop using your favouroute paint application (I use Paint.NET) , 64x64 pixels in size. The "split raindrop" used in many weather patterns, looks something like this - the link to download the file is here and then use a tool like "RWAceTool" (available from many sites online including UKTrainSim here - RWAceTool on UKTS. Note that i've made the texture show up here with a black background since with only alpha transparency, it would otherwise be rather hard to see.
This texture must be an ACE file and it must be placed in the Weather folder. From here, we can start using it.
Here's an example of one set-up of the precipitation, you can tweak values such as "alpha top", "alpha bottom" and "particle stream multiplier" to affect how the rain looks - generally, bigger numbers mean "more".

You can also see above where (and how) the raindrop texture is shown.
Weather Type
Now that we have our clouds and precipitation, we need to set up some weather types. There are essentially three different weather types that i'm going to define in this example (of course you can do however many you wish!) - but in order to make it work the way I want, I actually need to double some of them up, i'll explain why as we go.
Whether you need to double up on your weather types depends on whether you want to have weather changes script-controlled, or if you just want to kick off a timed sequence from the script. If it's fully script controlled, you need to essentially have "Start" and "Continue" weather types with a couple of small changes, if it's all done within a single chain then you can keep things simpler.
I'm going to be showing the more complex case, where it's entirely script controlled, so simply note that you can cut some steps out if you put all your weather changes in one chain.
In our weather types, the three main types we want to define are:
- Rain
- FoggyRain
- FoggyDownpour

So what is this defining?
You can set up wind direction and speed, which will affect smoke particle effects. You will refer to the precipitation entries you set up previously, and then say how much rain (0.1 is light, 1.0 is heavy), and how fast the rain is travelling. The Glass Weather Boost we'll see in a moment, but basically this says whether there's more rain hitting the windscreen to create a much more intense effect.
You can also set up fog - we'll do that next too.
Blend times i'll cover in a moment as there are numerous blend times to consider in order to set things up correctly.
This is also where you set up the reference the cloud types you configured earlier.
The last parameter "audio" we'll look at in a future tutorial, but essentially if you want lightning cracks and thunder (Or indeed any other audio) then this is where you tell the weather blueprint how to access the audio blueprint that has the sound set-up in it.
So that's a simple example which hs no fog and sets up some light rain. Let's look at the next one, which adds fog:

This example pushes up the precipitation density a little, basically making it rain a bit harder outside the train. This time we also tick the "fog override" box and set up some settings which control what colour the fog is, how transparent it is, how far away does it start and when does it end. I've also changed the sky dome so that it will use a different cloud formation.
Lastly, let's make it rain really heavily:

So that's the main three weather types.
The other three weather types i've defined are used for merging between them, they are identical but they have got a "blend in time" of 0 minutes, making them instant. In the next section, where we finally set up the triggered event chains, i'll cover why we need these and how all the blend times work.
Triggered Weather Event Chains
Now that we've set up all the resources for the weather patterns, it's time to link them together.In the Triggered Weather Event Chain section, click Add Element.
I'm going to start the sequence off by just making it light rain, so the first chain will be called "Rain" and will start the "Rain" weather type, as follows:

The "Name" is the name that we'll reference in the LUA script. Loop mode is set up to be "Hold end" which should keep it going after the chain finishes - though i've had mixed results with this, which is why the duration of the weather type event is set to 999 minutes. Inside the chain, you then set up a sequence of weather types - in my case i've just put one, but if you wanted to put a longer sequence of timed events together this is where you do it, just keep adding events and noting how long each one should last.
The blend out time is set to a very small number, let's look at the next chain and then we'll see how you get from chain to the next.
In the scenario set-up, i've set it such that when you go over a waypoint somewhere down the line it simply causes the next event to occur, this means i've got complete control over the weather happening at the right point in the scenario, so if I take a longer or shorter time to get to that point, it will still always start raining (or whatever) once I go past it. This may or may not be useful - if you want specifically to have just a timed sequence of weather that means that the player is encouraged to get a move on to ensure they're off a hill before a storm starts, then you would just put everything in a single timed chain. If you want to ensure that they always get a storm when they hit a hill, to make climbing the hill more challenging, then you want scripted control.
So let's take a look at the next sequence:

When you kick a weather sequence off using a LUA script command, it will "blend in" to the first weather type, and then remain there until that weather types "duration" is expired. At that point, it will "blend in" to the next weather type and so forth. Once it runs out of weather types it will refer to "loop" mode to find out what to do next. It will always blend from the state it's in, to the next one. If it's set to "stop" then it will take "blend out" minutes to then go back to the scenario standard weather pattern.
If a weather chain is currently running when you tell it to start another one, it will take "blend out" minutes to blend the existing weather chain out before beginning the next one.
This presents us with a big problem if we are in the middle of a foggy thunderstorm and then we switch to the next weather chain and it wants to then gently take us out of the thunderstorm - because the first thing that happens is the game will blend it out to whatever the default weather is and then blend back in to the new weather. In some cases this might be exactly what you're looking for, but in my case it wasn't - and that's why I had to add some extra weather types.
So we started the scenario with a nice sunny day, the we started "Rain" and over the course of a minute or so it started raining. Now we've hit the next marker and we want to go from "rain" to "foggyrain" without going back to "sunny". We set the "blend out time" of "rain" to be extremely short - so it will go back to sunny instantly, then the "Rain2" blueprint has a 0 minutes so it will instantly go back to raining again, which will last for about 6 seconds before it then begins a gentle fade over a minute or so towards foggy rain. This isn't ideal, it means that if you're looking, you'll notice a very tiny flash as the weather system goes back to sunny and then back to raining, however this can just as easily look like a lightning flash too - so I leave it to you to creatively decide whether you like that approach or not.
Let's look at the next chain:

The final chain, then, drops us back to Raining and then fades back to the sunny weather:

Once you've set it up, right click on the weather blueprint in the left hand pane (the one that looks like an Explorer folder tree) and select Export, followed by Export with References.

You should see some output in the lower pane and it should end by saying "==== Export Succeeded ====" - if it doesn't then go back and check. You should also see any error messages reported in that output window as well.
Script
Let's go back to our scenario script and see how we actually kick all these weather chains off, using the SysCall we talked about right at the start:function OnEvent(event) _G["OnEvent" .. event](); end function OnEventWeather1() SysCall("WeatherController:SetCurrentWeatherEventChain", "Rain"); end function OnEventWeather2() SysCall("WeatherController:SetCurrentWeatherEventChain", "FoggyRain"); end function OnEventWeather3() SysCall("WeatherController:SetCurrentWeatherEventChain", "FoggyDownpour"); end function OnEventWeather4() SysCall("WeatherController:SetCurrentWeatherEventChain", "Finish"); end
In the scenario i've set up a bunch of "stop at" instructions, each one with a minimum speed of 1mph (which turns them in to go-via instructions, but allows me to put a trigger on them). Here's an example of how I set one of them up:

Concluding Notes
I've set lots of blend timings quite low here because it allows for a more clear and obvious example, when developing your own I would suggest that you use short blend times to start with to allow you to more clearly see the result of each change. Once you've then got the right weather looking the way you want then you can dial up the blend times to get some splendid smooth transitions.I have not covered the "Location" events, this is where you can add lightning bolts in the sky, rainbows, audio for thunder claps and also flash the sky. I think this tutorial is definitely long enough for now, so i'll come back and do Location events in a future tutorial, perhaps once i've had some feedback on how people feel about this one.
When I set the blog up, it was intended to be only the most basic parts of scripting capable of accessing with the sole goal of enhancing scenarios. This is one of the most complex examples because it involves you going in to the blueprint editor, this is not going to be a problem for anyone familiar with content creation piplines in Train Simulator but for the average user I expect this to be something you go in to with some degree of trepidation. I hope that i've covered it with enough detail to show that it's not too hard and the results are clearly very well worth the effort.
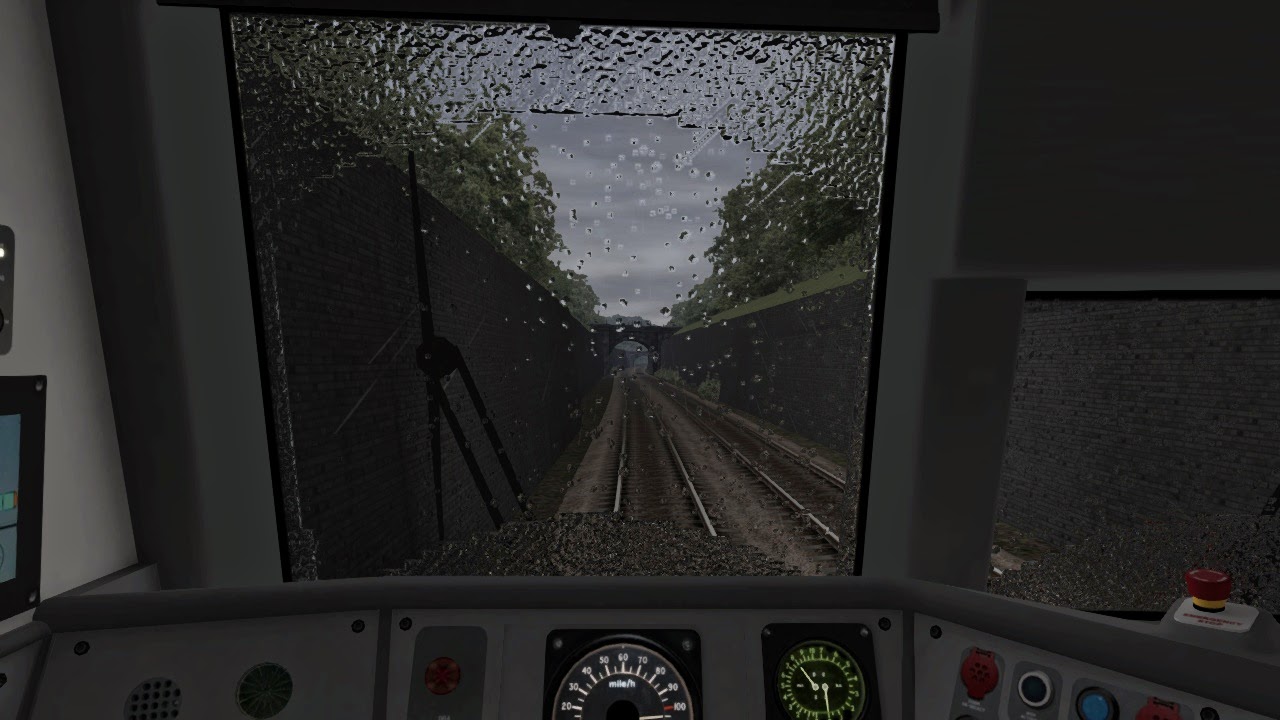
What does it look like?
I'll leave you with some screenshots from my example scenario showing what it actually looks like in-game.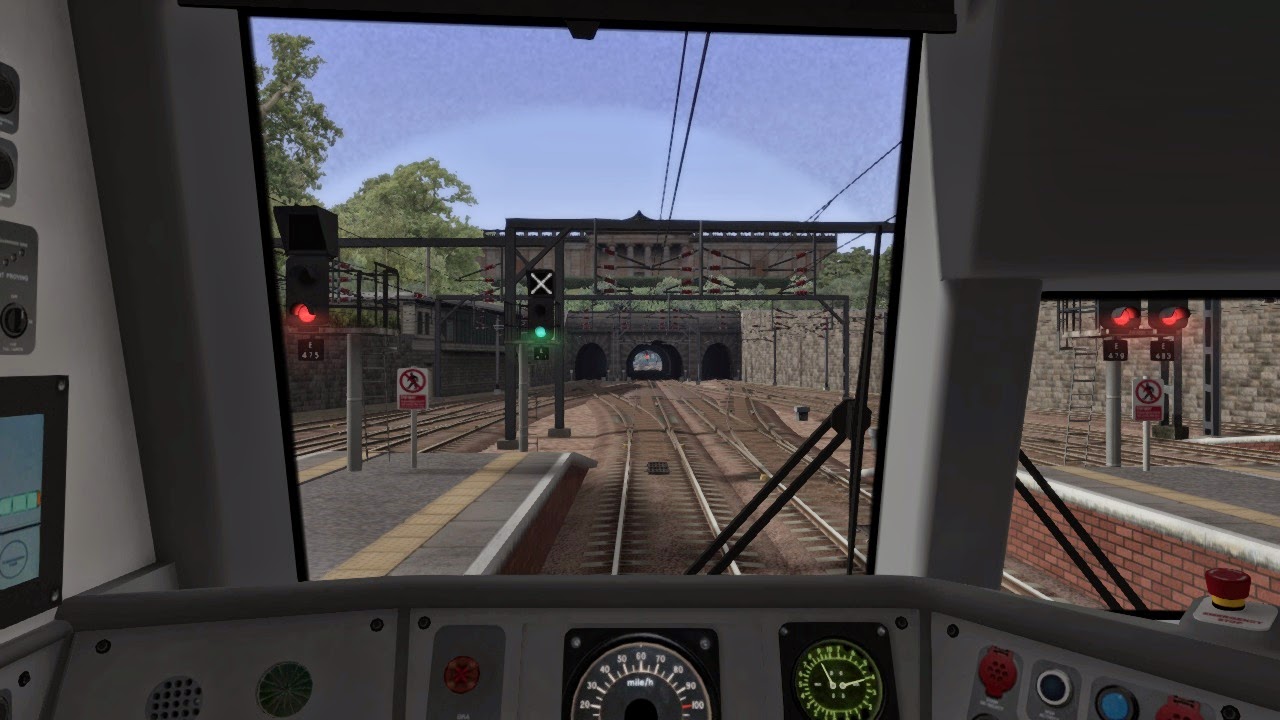 |
| Departing Edinburgh on a lovely sunny day, clear skies |
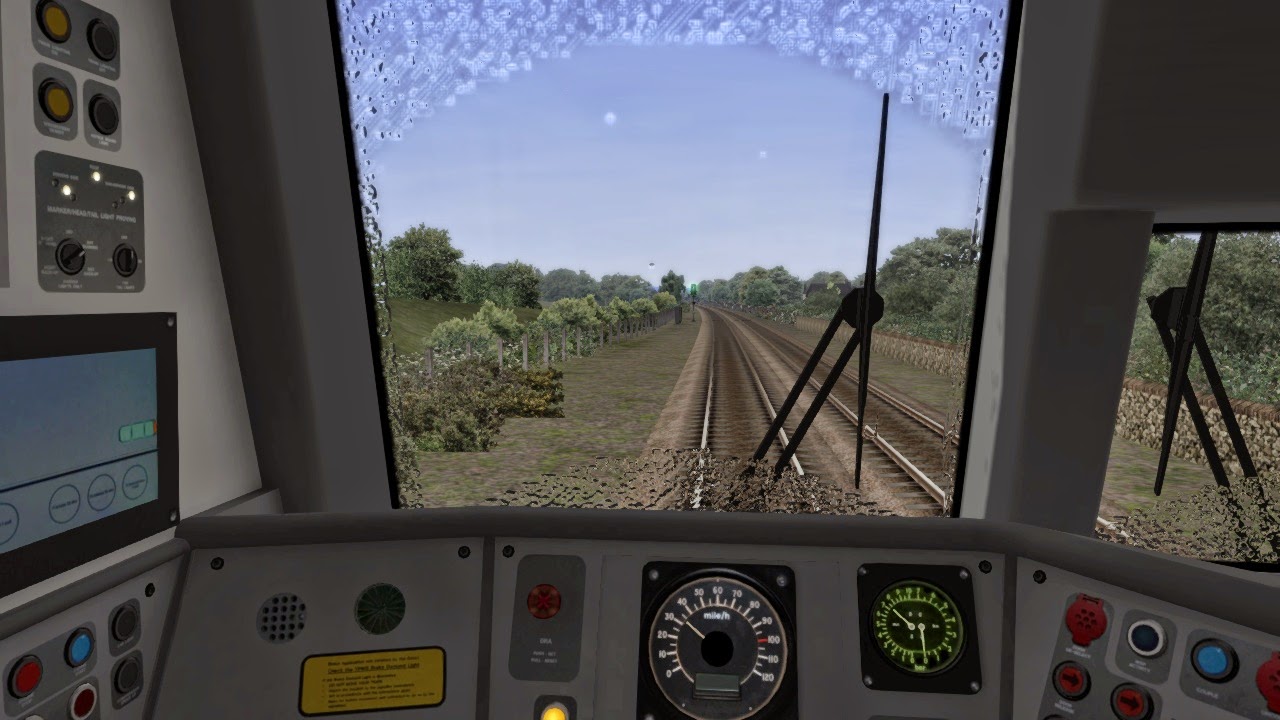 |
| As we went through Haymarket, rain started to appear |
 |
| The clouds seem to have taken a turn too, looks like we're in for a storm. |
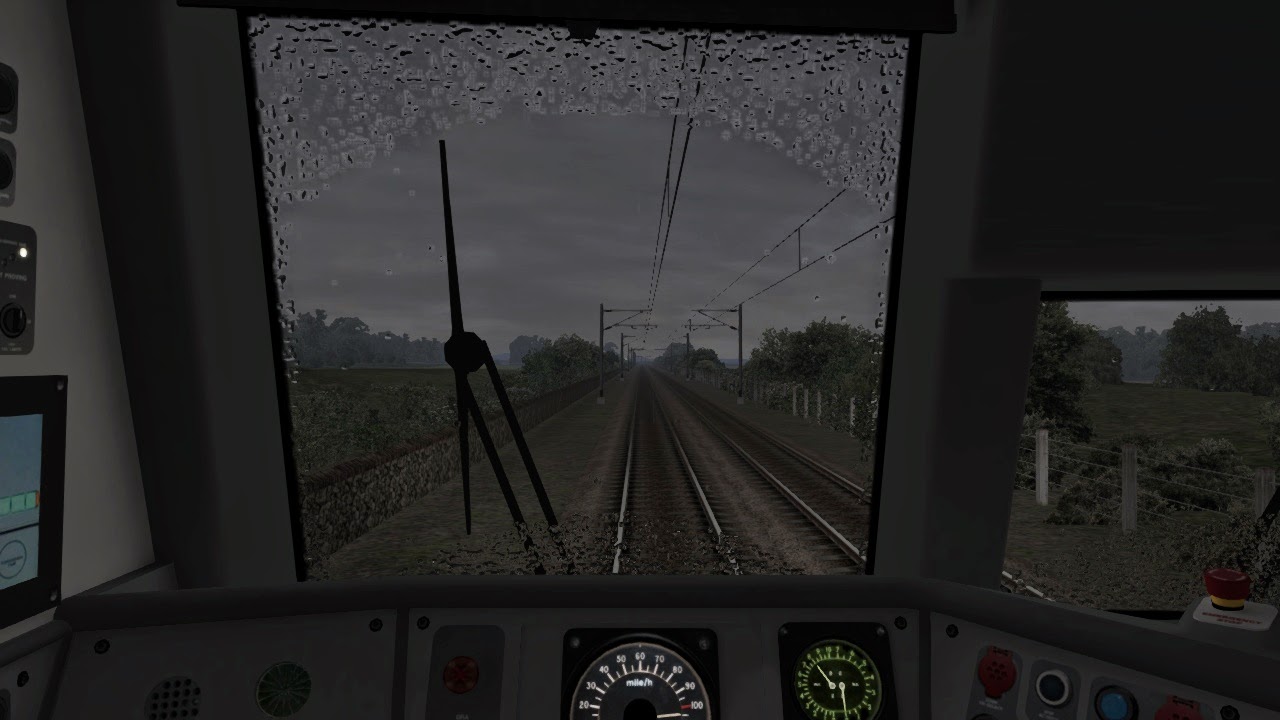 |
| Passing Edinburgh Park, the skies darken and the fog starts to draw in. |
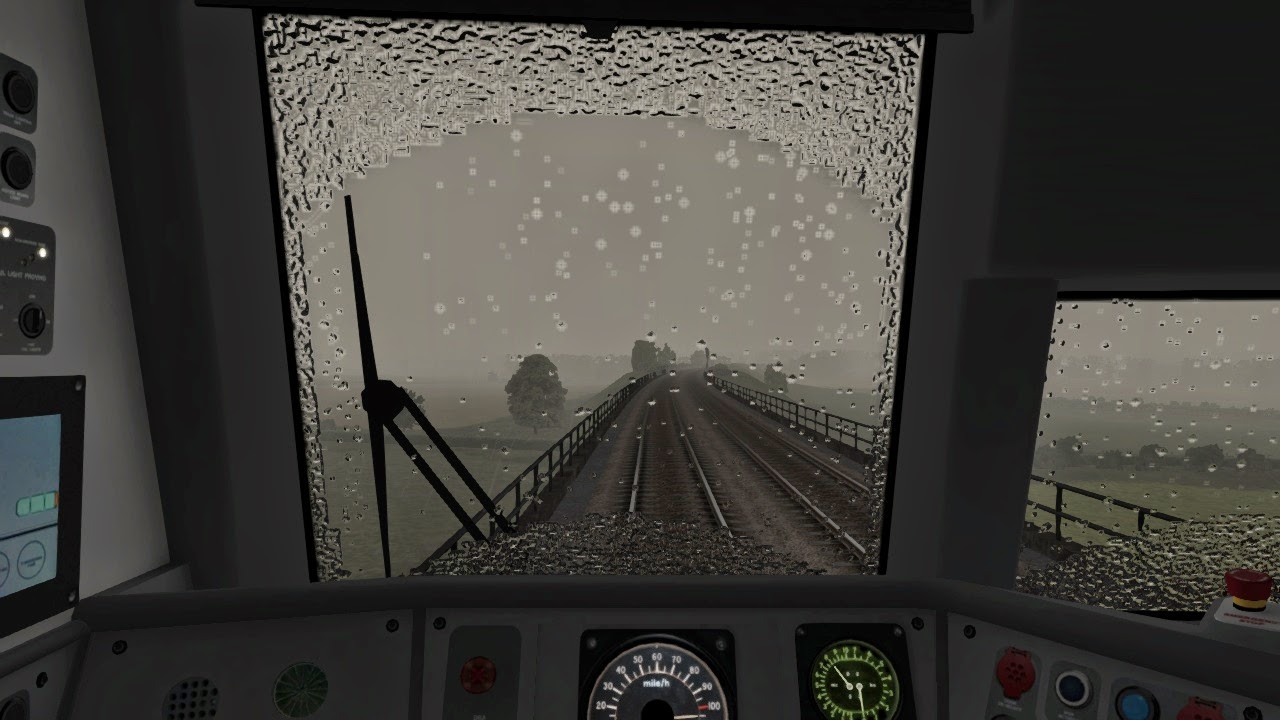 |
| The fog really seems to be closing in now after we pass Bathgate Junction and the rain is getting really itense, even with wipers on I can't keep up with the rain! |
 |
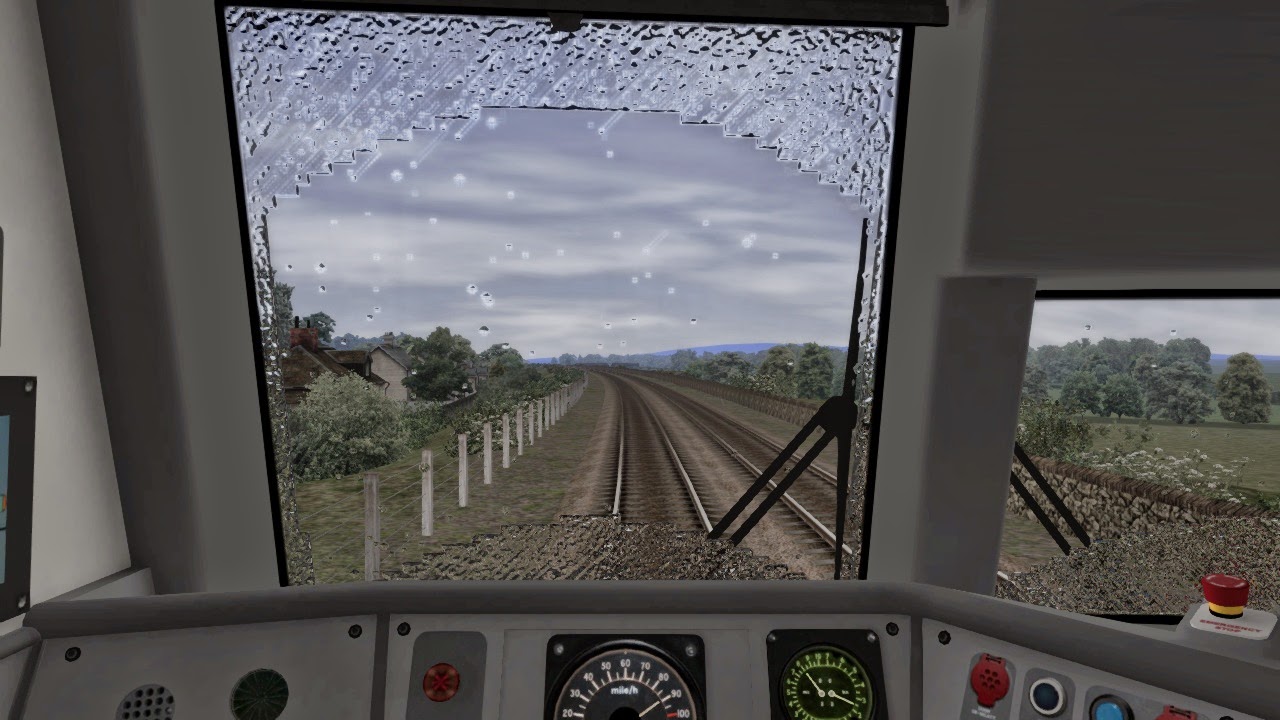
| Passing Winchburg the fog has lifted and the skies are lightening up, maybe we're through the storm. |
 |
| Heading towards our end point everything is brighter now and the rain is easing off. |
 |
| Finally, the skies are back to clear and there's just an odd spot or two appearing on the window! |
Hi Matt,
ReplyDeleteFirst let me thank you for the amazing work, LUA scripts adds a lot to the scenarios for sure!
I made my first weather blueprint and it works good. I tried to put a .wav file on the "audio controller name" but it doesn't seem to work at all, there is something i'm missing i guess. So here is my question : Are you going to do a tutorial on how to use audio files with the weather type ? I see you mentioned it in this topic so I guess this is on your to do list. Well I hope it is !
Thank you again
Absolutely - weather location events are on the to-do list and that will include setting up audio for lightning and other uses. Really great to hear that you're getting on well with it! - Matt.
DeleteHi Matt,
DeleteFirst of all, thanks for this great Tutorial. It helped me very much.
Actually i wanted to ask, if the Weather Location Event Tutorial is still on your To-do list?
Greetings from Germany
Hi Matt,
ReplyDeleteThe link to the UKTS split raindrop gives a blank tab with url and UKTS logo. I have tried searching UKTS but I couldn't find it - can you help please?
Right click on the link, then click Save Target As (IE), Save Link As (Firefox). I dunno what it says for Chrome.
Delete(It should save in either Downloads or My Pictures)
DeleteI have a problem right here. I did everything you did in the tutorial, checked everything hundreds of times, but the fog is yellow. I even turned the fog color override to blue for testing, its still yellow.
ReplyDeleteScreenshot: http://puu.sh/k1KzT/acdbefdbca.jpg
You sure yor scenario isn't set in 19th century London? :P
DeleteHi Matt, Spent a couple of days creating a scenario with a custom weather blueprint. Workshop won't allow me to post - unrecognised blueprint set(which is the one I've created!) Gutted.....
ReplyDeleteI got this too. did you get it sorted?
DeleteI've created my own blueprints for South London to Brighton for a scenario in a 4CIG, however, when I get to the exporting stage, it terminates saying: "ConvertToTg.exe exited with exit code 0xC0000374 trying to convert C:\Program Files (x86)\Steam\steamapps\common\RailWorks\Source\Cameron Young\ScenarioAssets\Weather\split_raindrop.ace or one of its dependencies
ReplyDelete[10] Could not export Cameron Young\ScenarioAssets\Weather\split_raindrop.ace: See previous errors
Export process terminated due to errors.
==== Export Failed ====
Time taken: 78.553s"
Can anyone help?
I cant publish it because it says scenario uses unrecognized blueprint set. What can I do about this?
ReplyDeleteI believe it treats it as a custom blueprint so it won't work.
ReplyDeleteHi Matt,
ReplyDeleteWhat a wonderful article and youtube video you created for this. I can't wait getting my hands dirty.
Problem I'm facing is that TS16 / 17 has no "Source" folder. So where should I put it now?
Keep up this great work. (Can you please look up how we can make in train announcements whilst approaching a station)
Hi. I´ve been trying on and off for a couple of years to make this work......... I´ve still not cracked it and I´ve gone through everything word for word. Only thing I am slightly confused on (I think) is the first SysCall for FirstChain. Do I need to do something with this? Many thanks, Simon
DeleteMatt, after fiddling around with this for days trying to get it to work with a custom blueprint, I finally figured out. You really need to include the steps you have to take in the editor to get this implemented. First of all, when I exported my blueprint with references it was not exporting any data into the bin file, nor was it converting the .ace file of the raindrop to .tgpcgx - it would only work if I forced export with references. Secondly, you have to activate your developer folder from the right hand flyout in the scenario editor, and lastly you need to (as you pointed out with the Pacific Surfliner route) activate the extended weather pattern you created from the gear icon menu. Then it works as advertised.
ReplyDeleteThank you very much for writing such an interesting article on this topic. This has really made me think and I hope to read more. pnr status
ReplyDelete