I've had a lot of requests for the in-game background music that I use on TrainSimLive - it's a chilled instrumental version of the main theme tune and I love how it fits with the games menus etc, so i'm really happy to now be sharing the music and helping you install it.
First note - this tutorial is not a general how-to on how to put your own music in the menus, I have already done all the "hard" work to make this a simple drop-in task so that everyone can do it, if you want to put your own music in then I simply direct you to google for it, I believe there are guides and tutorials put together by others.
Second note - if you are not completely confident copying and pasting files around using Windows Explorer then this is probably not for you. I've tried to make this as simple as possible but it does involve opening up Windows Explorer doing a rename and pasting a file inside the games core content, if that fills you with chills then I'd suggest you probably should leave the game as is.
Last note - if anything goes wrong with the game you can just do a verify local file cache to restore it.
Ok, installation - the first thing you'll need is the file itself, here - click the link to download approx 43mb "DAV" file. DAV files are the audio file format used by Train Simulator and are a properietary variant of the WAV file format.
TSL In-Game Music Audio
Once you've downloaded that it should be in your download folder somewhere - don't ask me where that is, it's different depending on how your machine is set up, what browser you're using and so forth. For me, they normally just appear in the "downloads" folder that is accessible directly from Windows Explorer. I'm using Chrome on Windows 10.
Let's find the location the audio file needs to go, fire up Windows Explorer and go to this location if your installation of Train Simulator is in the default location. If it's not in the default location, i'll leave it as an exercise for you to figure out where it is now since I can't predict what you've done :)
C:\Program Files (x86)\Steam\SteamApps\common\RailWorks\Assets\Kuju\RailSimulatorCore\Audio
Inside here you should find a file called:
UI_FrontEndLoop.dav
Rename this to:
ORIGINAL_UI_FrontEndLoop.dav
That way you have a backup and can quickly swap it back if you wish.
Now copy in the file you downloaded (which, conveniently has the right name already!) in to this folder.
Start the game, sit back, and chill :)
Enjoy!
Full credit for the music goes to Duo Astral Plane who did both the main TrainSimLive theme tune music (with vocals) and this instrumental version for the in-game menus. You can find out more about their work at http://www.astralplanemusic.com/ and I sincerely thank them for their work putting this together!

Sunday, 22 November 2015
Sunday, 26 April 2015
Creating Consists via Blueprints for Quick Drive and AI
There are no less than three ways of making consists in TS2015!
The first has been around since the beginning - simply place some vehicles on the track, go to the consist tool and then double click on the grey boxes above the vehicles, you can then give it a name and then re-use it later. It was a good way to short cut the process for a single scenario but didn't persist between routes so it was of limited use.
Later, Train Simulator added an excellent built-in system for creating your own consists via a user interface in the menu system, which was a big step forwards however these consists still won't appear as AI trains in Quick Drive scenarios.
So how exactly do you create those?
The answer is in the third method - via blueprints. It's a bit tricky and certainly not easy, but if you can figure out how to create them you may find it preferable since it has some neat ways of re-using sequences over and over that can be a huge time saver... not to mention that any consist you create here can show up as AI in your Quick Drive scenarios too!
C:\Program Files (x86)\Steam\SteamApps\common\railworks
Inside here, if you don't already have a "Source" folder, create one.
Now you're going to need to decide on a "provider" folder name - this can be anything you like, whether its a nickname, organisation name or your name in some form. I've got for "MattPeddlesden".
Underneath that you need to think of a product name - so i've just gone for "QDStuff" but you might want to take slightly more time and come up with something a bit better :)
Lastly, we need to add a folder "PreLoad" (note the capital P and the capital L are important!) underneath that.
When that's all done, you end up with this:
 Inside the RailWorks folder you'll find an executable application file called "BlueprintEditor2.exe" - double click it to run, and you'll get a screen something like this:
 On the top left pane, titled "Explorer" you can see the Source folder that you created, expand this a couple of times so that your new PreLoad folder is visible. This is where we'll be doing all our work!
There are two types of consist blueprint within the game, one is the "Consist Blueprint" and these are the ones that result in new options being available in the game. Ultimately what you do has to end up in new consist blueprints or nothing new will happen. The other type is a "Consist Fragment Blueprint" and these are used to keep re-usable sequences, for example you could have a sequence of 40 wagons or a 12 passenger coaches and then later create a bunch of new Consist Blueprints by simply having a different loco plus the 12 coach fragment - two simple entries and an easy way to rapidly create some great variety.
We're going to start by creating the Consist Blueprint, get them working and then we'll almost immediately see how Fragment's will be useful - so we'll get one of those created and use it.
From the list that pops up, select "Blueprint" from the left side and "Consist Blueprint" from the right hand side.
 Name it something sensible so that you can easily find it later. The filename isn't used in-game but it is always useful to be able to work out what files contain what. Since i'm planning on just making this a quick test, i've just gone with a simple name, later on we'll delete this once we get the hang of it and start doing it properly!
Click Ok and the new blueprint will be created.

There are a number of different sections to this file so let's take them one at a time as an overview first, and then we'll drill in to them to get it set up.
Consist Entry
This defines the actual vehicles that are in the consist. A consist does not have to contain any locomotives, but it must have at least one of something of course! If it has no locomotives, note there is a setting later that must be ticked to say it's not drivable.
Loco Name and Display Name
In the Quick Drive selection screen you have a list of locomotives, and then when you click on one you have a list of consists. Let's look at a couple of screenshots that i've taken from the game, where I have highlighted the key sections.


Where i've highlighted in GREEN, this is the "Loco name" field. Where I have highlighted in RED, this is the "Display Name" field.
If I create a new consist where the Loco Name is "A loco" then it will create a new entry in the grid in the first screenshot called "A loco". If I call it the same as something else, e.g. "GE U36 SBD" then my consist will end up being one of the selections inside that. What it means is that if you simply want more consist variety for a particular loco you can do so without polluting this already quite busy list with a lot of duplication.
The Display Name field should be used to describe the specific consist (e.g. "2+1+1 with 150 car manifest" or "12 Coach Mark 3 Passenger Blue Greys". When someone clicks on the loco entry in the grid of the first shot, they get the list of consist display names that were found using that "loco name" (which again could be from lots of different places, it very handily merges them all in to one list). You may choose to duplicate the "loco name" component for clarity, or you may choose not to - personally I don't duplicate it. Once selected, the "display name" is shown in the right hand half of the current selected consist - top of the list of three boxes.
It's a little confusing at first, but once you get the hang of the naming system you'll find it does exactly what it needs to.
Engine Type
Straight forward - if this is a driveable consist what kind of lead loco is it? This is used for filtering.
If it's not driveable, it doesn't matter what you set this to as it won't be offered in a filterable lists.
Era Start Year and Era End Year
Note: There is currently a limitation in the game whereby if this doesn't include 2014 it won't be used, so for the time being I'd recommend leaving this at the defaults.
The intention of these options is to say what rough years this consist would have operated in. When you define a Quick Drive scenario template, you can specify what year the template is relevant for and this will then influence which consists appear. This means you can set up a 1950's Quick Drive that only features era-appropriate stock for instance.
Driving Engine Index
Where in the consist is the driving engine that the player will be sat in? Normally this is 0 - the lead locomotive. But if you have something like a Cab Forward or Big Boy then it might be further in the train. 0 is the front, 1 is the next rail vehicle in and so forth.
Valid Build and Drive Routes
This lists all of the valid routes that this consist can appear on, it's a list of route GUID's, and this is the way that the sim prevents SD70M's from appearing on ECML London to Peterborough, for example. This does not affect the choice the player has, you might say this US freight consist is only good for a set of US routes but as a player, I can still choose to drive it on ECML London Peterborough if I wish - but I won't see it as AI.
Drivable Consist
Tick this box if it is something the player can drive, untick it if it is simply a list of wagons. Consists that are just a variety of wagons and lengths of consists etc are great to have because they'll appear as "static consists" which will fill up your yards in Quick Drive's.
Consist Type
This one is crucial, it defines what kind of consist this is and is what will make it available to appear as an AI train. Set this to something appropriate for the consist from the list. You could choose also to make use of the additional "custom" types, these allow you to specify additional types of consists that have not been catered for already. When someone sets up a Quick Drive scenario template they define the various AI start points and what the chances of a particular type of consist appearing, this is where you link particular types of consists to specific consists, locomotives and rolling stock.
Has Pantograph, 3rd Rail, 4th Rail
These ones are used as an additional AI filter. When an AI spawner is set up in a Quick Drive template scenario, it has some tick boxes saying whether this spawner is suitable for rail vehicles that have pantographs, or 3rd/4th rail pickups. Simply tick these boxes to reflect the real requirements of this consist and the system will ensure you don't get overhead electric trains driving on 3rd rail electric routes (as long as it's all set up correctly of course :) ).
First we need to add the vehicles.
Expand the "Consist Entry" section and click Add Element.
Expand the new entries that appear so that you can see it completely, it looks like this:
 The CSX SD40-2 is part of the New York New Haven route, so the Provider should be set to "RSC" and the Product to "NewYorkNewHaven". These are the same names as you would tick when adding the item to make it available in a regular scenario, and are the same as the folders under the Assets folder - take some time to have a browse and get familiar so that it will be easier to find what you're looking for.
This next step is where it gets a little hairy if you're not familiar with how locomotives are structured on your hard drive!
Assets, AP files and Other Complexities...
Before going any further I wanted to just outline how files are stored a little bit, just to give you a head start. Assuming the install for your TS2015 is here:
C:\Program Files (x86)\Steam\SteamApps\common\railworks
Then all the rail vehicles and other assets are stored here in the assets folder.
C:\Program Files (x86)\Steam\SteamApps\common\railworks\Assets
Beneath that is the provider folder, then the product folder. So if what we're looking for is RSC and NewYorkNewHaven, then our path for its assets is:
C:\Program Files (x86)\Steam\SteamApps\common\railworks\Assets\RSC\NewYorkNewHaven
If you go there however you'll find just an AP file (and possibly a PAK file, but ignore that!). An AP file is basically the same as a ZIP file and can be opened in something like 7-zip. Opening it, you will find a further series of files and folders. If it's a route AP file (as this is) then you'll find quite a lot in there, if it's just a loco pack then there are fewer folders.
Rail Vehicles are in the "RailVehicles" folder and from there the separation is usually fairly intuitive.
Continuing where we left off...
The Blueprint ID is the pathname and filename of the blueprint for the rail vehicle we want to add. In this case the files are in an AP file - so open this with 7-zip (or your favourite ZIP explorer) and we find that the diesel locomotive we want can be found here inside the AP file:
RailVehicles\Diesel\SD40-2\Default\Engine\
Tip: a .ap file is just a renamed .zip file, so it should load fine in any ZIP tool. Personally I use 7-zip as it's fast and free - you can download it from www.7-zip.org
Inside this folder are a bunch of files, the ones we are looking for are .bin files and in this case there are two - the one we want is sd40_2.bin - for the purposes of our consist, we will put "xml" instead of "bin" though.
This means that the final blueprint ID will be:
RailVehicles\Diesel\SD40-2\Default\Engine\sd40_2.xml
Even though the file itself is actually a .bin file, the game will look for both the .xml and .bin files, but as the blueprint editor is intended to work with source files, it must have the xml file. If that doesn't make sense, don't worry, just go with it :)
The last option "Flipped" will flip the vehicle around so that it faces the other way. We'll leave it as it is for now.
Ok, so this is where we're at now:

At this point it's worth answering a couple of questions you might be thinking about...
Can I use vehicles from lots of different provider/product's?
Yes, as many as you want, you can mix a "Marias Pass" loco with a "Miami West Palm Beach" wagon and a "New York New Haven" wagon if you want! Just remember that the more you add, the more the game will have to load, since it loads the entirety of a provider/product when it accesses any part of one.
Do I need to unpack the AP file?
No, leave it exactly as it is.
That's the first entry on the consist done. Let's add a couple of wagons - click the Add Element button again.
We'll add a wagon from the same route just to make things easy, set up the same Provider and Product as before. Navigate back in to the AP file for New York New Haven and we can see that there are a number of wagon types, i'm going to go with the box car, so our blueprint folder is:
RailVehicles\Freight\BoxCar\Default\Wagon\
Inside here, there are a number of bin files, but two of them are the bogie definitions, leaving one which refers to the wagon itself. Don't forget to change "bin" to "xml" for the blueprint ID, meaning our Blueprint ID is therefore:
RailVehicles\Freight\BoxCar\Default\Wagon\box_car.xml
Let's see how our consist is looking now:
 With everything you've just done, you can imagine setting up a 120 wagon consist is going to start getting hard work! Assuming you're repeating items however, there is a short cut to make it a bit easier so the second wagon we add is going to just be the same as the first.
Click the Add Element button and expand everything out again, as if we were going to do it the same way we did the first one.
Now right click on the "Consist Entry" header of the FIRST wagon we added and select Copy. Now right click on the "Consist Entry" header of the NEW entry we just added (the one that is currently blank) and select Paste. That's the second wagon done, much easier.
Now that the rail vehicles themselves are done, let's go through the rest of the blueprint.
Loco name - let's make it the same as the existing Sd40-2 so that it simply adds to the list, which means it needs to have a Loco Name of "EMD SD40-2" - it is again essential that capitalisation matches.
Display Name - our consist is simply a couple of box cars so let's call it "2 Box cars".
Engine Type - Diesel.
I'll leave the era start and end years as they are.
Driving Engine Index we will leave as 0.
Valid Build and Drive Routes
For this, click the Add Element button and it will add a "Consist Valid Route" entry with a "Route GUID" entry. What you need to know now is what the GUID's are for the routes you want to add it to. I found an excellent post on the Steam Forums which lists all the routes (and many freeware routes) and their GUID's, you can find it here:
http://forums.steampowered.com/forums/showthread.php?t=3257269
Simply paste one Route GUID in to the entry box to enable this consist to appear as AI on that route. Let's add New York New Haven.
 And then click Add Element again, and add the GUID for Miami West Palm Beach, so we now end up with:

This means that our consist can now randomly appear as an AI consist on quick drives that happen on these two routes, but it won't appear on any others.
Drivable Consist - this is drivable, so tick the box.
Consist Type - there really isn't an ideal type in this box so i'm going to set it to Freight - Container. As I mentioned earlier, this relates to how the quick drives themselves are set up. You pick anything - this could be a "freight livestock" if you want, and then if you give "freight livestock" a chance of showing in the quick drive it will all simply work. Choosing a reasonably appropriate one just helps you create QD's that make sense and try to have the right trains in the right places. If you find there aren't any appropriate options then you can use one of the "custom" options but again, these are no good unless the QD itself offers a chance of the same ones appearing. If you're creating the consists AND the quick drives then that's ideal and you can create something really nice.
I would recommend that if you create a quick drive, you should document the types of consists you've used and their chances of appearing, that'll help anyone making new consists to ensure that they use the right types.
The last three settings relate to electric trains, if this was an ACS-64 then I would tick the "has pantograph" button but as it's a diesel, I will leave them all unticked.
That's it - our first consist has been created.
Press CTRL-S to save it (or go to the file menu and click Save).
It's important to double check all of the entries you've typed in, the process of exporting will not check to make sure you have put the right paths in because to do that you need the full asset source.
In the "Explorer" section where your new blueprint consist file is, right click on the file and select "Export" followed by "Export This Only". It's important to choose "Export This Only" because this option will not try to export anything else - and since we don't have the source for the locomotive and wagons that's a good thing! If you do have all the source because you're actually making the stock yourself then just export as normal and it will error check everything properly as it goes.
Now let's go in to the game and test it!
Once in the Quick Drive section, find the EMD SD40-2 entry and then see if your consist is present. If it is that's the first win. Select it and enter the quick drive. If it loads and then errors right at the end, it means one or more of the entries you've added for the blueprint id's or provider / products is incorrect - check it. You might get some help by enabling logging (detailed in an earlier blog post).
Once all is working you should now be in the game driving the consist you just made!
That's all you need to get started, you can now make any consist you like - but making a consist that has the same 120 wagons but one of 5 different loco's at the front would currently either mean duplicating that 120 wagons five times. Nightmare! This is where Consist Fragments come to the rescue in a big way!
In the same way we created a Consist Blueprint, you can create a Consist Fragment blueprint. I would strongly suggest a naming convention on the filenames so that fragments are easily identifyable, you could also put them in a sub-folder. I would suggest a prefix like "F-" or "Fragment-" just to be clear.
Inside the fragment blueprint is just the section of consist entries, so all those blueprint id's, providers, products etc and nothing else. You could make up a set of say 20 container wagons here or a 5 car passenger train (just the coaches).
Having saved and exported the fragment you can now use it in the main Consist Blueprint - set the provider and product to your provider and product (e.g. MattPeddlesden and QDStuff for my test example here) and then the blueprint ID simply points to the fragment. There is, however, a nice easy way to do this!
Open the Consist Blueprint you want to use the fragment in and add an element where the next wagon should be placed.
Right click on the Fragment filename in the Explorer pane, select Copy.
Now expand the blank consist entry and right click where it says "blueprint name" - and click Paste.
The Blueprint editor is clever enough to know how to interpret the location of the blueprint you copied and fill in all the blanks for this consist entry! That's the fragment added.
So if you defined say 10 coal cars, 10 auto racks, 15 low gons etc you could then add half a dozen different fragments and end up with a 100 car manifest train and still have a bunch of fragments you can chop and change around and re-use in other consists.
The other really nice thing about this reusability is that if, later, you find a better coal car, you can simply open each fragment that uses it and swap in the new car - and all of the consists which use those fragments will automatically reflect the changes.
It's been a long journey but we got to the end at last :)
I look forward to seeing what you all do with this exciting feature :)
If you missed my video on creating quick drive scenarios then you can find it here on YouTube:
https://www.youtube.com/watch?v=uTSwEuWPZH8
The first has been around since the beginning - simply place some vehicles on the track, go to the consist tool and then double click on the grey boxes above the vehicles, you can then give it a name and then re-use it later. It was a good way to short cut the process for a single scenario but didn't persist between routes so it was of limited use.
Later, Train Simulator added an excellent built-in system for creating your own consists via a user interface in the menu system, which was a big step forwards however these consists still won't appear as AI trains in Quick Drive scenarios.
So how exactly do you create those?
The answer is in the third method - via blueprints. It's a bit tricky and certainly not easy, but if you can figure out how to create them you may find it preferable since it has some neat ways of re-using sequences over and over that can be a huge time saver... not to mention that any consist you create here can show up as AI in your Quick Drive scenarios too!
Folder Structure
To get started, let's go in to the railworks home folder via Windows Explorer. On most systems that install to the C: drive by default, that is:C:\Program Files (x86)\Steam\SteamApps\common\railworks
Inside here, if you don't already have a "Source" folder, create one.
Now you're going to need to decide on a "provider" folder name - this can be anything you like, whether its a nickname, organisation name or your name in some form. I've got for "MattPeddlesden".
Underneath that you need to think of a product name - so i've just gone for "QDStuff" but you might want to take slightly more time and come up with something a bit better :)
Lastly, we need to add a folder "PreLoad" (note the capital P and the capital L are important!) underneath that.
When that's all done, you end up with this:
There are two types of consist blueprint within the game, one is the "Consist Blueprint" and these are the ones that result in new options being available in the game. Ultimately what you do has to end up in new consist blueprints or nothing new will happen. The other type is a "Consist Fragment Blueprint" and these are used to keep re-usable sequences, for example you could have a sequence of 40 wagons or a 12 passenger coaches and then later create a bunch of new Consist Blueprints by simply having a different loco plus the 12 coach fragment - two simple entries and an easy way to rapidly create some great variety.
We're going to start by creating the Consist Blueprint, get them working and then we'll almost immediately see how Fragment's will be useful - so we'll get one of those created and use it.
Consist Blueprints
Right click on the PreLoad folder and select Add, followed by New Item.From the list that pops up, select "Blueprint" from the left side and "Consist Blueprint" from the right hand side.
Click Ok and the new blueprint will be created.
There are a number of different sections to this file so let's take them one at a time as an overview first, and then we'll drill in to them to get it set up.
Consist Entry
This defines the actual vehicles that are in the consist. A consist does not have to contain any locomotives, but it must have at least one of something of course! If it has no locomotives, note there is a setting later that must be ticked to say it's not drivable.
Loco Name and Display Name
In the Quick Drive selection screen you have a list of locomotives, and then when you click on one you have a list of consists. Let's look at a couple of screenshots that i've taken from the game, where I have highlighted the key sections.
Where i've highlighted in GREEN, this is the "Loco name" field. Where I have highlighted in RED, this is the "Display Name" field.
If I create a new consist where the Loco Name is "A loco" then it will create a new entry in the grid in the first screenshot called "A loco". If I call it the same as something else, e.g. "GE U36 SBD" then my consist will end up being one of the selections inside that. What it means is that if you simply want more consist variety for a particular loco you can do so without polluting this already quite busy list with a lot of duplication.
The Display Name field should be used to describe the specific consist (e.g. "2+1+1 with 150 car manifest" or "12 Coach Mark 3 Passenger Blue Greys". When someone clicks on the loco entry in the grid of the first shot, they get the list of consist display names that were found using that "loco name" (which again could be from lots of different places, it very handily merges them all in to one list). You may choose to duplicate the "loco name" component for clarity, or you may choose not to - personally I don't duplicate it. Once selected, the "display name" is shown in the right hand half of the current selected consist - top of the list of three boxes.
It's a little confusing at first, but once you get the hang of the naming system you'll find it does exactly what it needs to.
Engine Type
Straight forward - if this is a driveable consist what kind of lead loco is it? This is used for filtering.
If it's not driveable, it doesn't matter what you set this to as it won't be offered in a filterable lists.
Era Start Year and Era End Year
Note: There is currently a limitation in the game whereby if this doesn't include 2014 it won't be used, so for the time being I'd recommend leaving this at the defaults.
The intention of these options is to say what rough years this consist would have operated in. When you define a Quick Drive scenario template, you can specify what year the template is relevant for and this will then influence which consists appear. This means you can set up a 1950's Quick Drive that only features era-appropriate stock for instance.
Driving Engine Index
Where in the consist is the driving engine that the player will be sat in? Normally this is 0 - the lead locomotive. But if you have something like a Cab Forward or Big Boy then it might be further in the train. 0 is the front, 1 is the next rail vehicle in and so forth.
Valid Build and Drive Routes
This lists all of the valid routes that this consist can appear on, it's a list of route GUID's, and this is the way that the sim prevents SD70M's from appearing on ECML London to Peterborough, for example. This does not affect the choice the player has, you might say this US freight consist is only good for a set of US routes but as a player, I can still choose to drive it on ECML London Peterborough if I wish - but I won't see it as AI.
Drivable Consist
Tick this box if it is something the player can drive, untick it if it is simply a list of wagons. Consists that are just a variety of wagons and lengths of consists etc are great to have because they'll appear as "static consists" which will fill up your yards in Quick Drive's.
Consist Type
This one is crucial, it defines what kind of consist this is and is what will make it available to appear as an AI train. Set this to something appropriate for the consist from the list. You could choose also to make use of the additional "custom" types, these allow you to specify additional types of consists that have not been catered for already. When someone sets up a Quick Drive scenario template they define the various AI start points and what the chances of a particular type of consist appearing, this is where you link particular types of consists to specific consists, locomotives and rolling stock.
Has Pantograph, 3rd Rail, 4th Rail
These ones are used as an additional AI filter. When an AI spawner is set up in a Quick Drive template scenario, it has some tick boxes saying whether this spawner is suitable for rail vehicles that have pantographs, or 3rd/4th rail pickups. Simply tick these boxes to reflect the real requirements of this consist and the system will ensure you don't get overhead electric trains driving on 3rd rail electric routes (as long as it's all set up correctly of course :) ).
Setting Our First Consist Up
Now that we've looked at the options, let's get the first consist set up. For this consist i'm just going to drop in a CSX SD40-2 followed by two wagons, just to keep it simple and show a couple of extra steps off. We're also going to set it up so that it can appear as an AI train in Quick Drive scenarios.First we need to add the vehicles.
Expand the "Consist Entry" section and click Add Element.
Expand the new entries that appear so that you can see it completely, it looks like this:
This next step is where it gets a little hairy if you're not familiar with how locomotives are structured on your hard drive!
Assets, AP files and Other Complexities...
Before going any further I wanted to just outline how files are stored a little bit, just to give you a head start. Assuming the install for your TS2015 is here:
C:\Program Files (x86)\Steam\SteamApps\common\railworks
Then all the rail vehicles and other assets are stored here in the assets folder.
C:\Program Files (x86)\Steam\SteamApps\common\railworks\Assets
Beneath that is the provider folder, then the product folder. So if what we're looking for is RSC and NewYorkNewHaven, then our path for its assets is:
C:\Program Files (x86)\Steam\SteamApps\common\railworks\Assets\RSC\NewYorkNewHaven
If you go there however you'll find just an AP file (and possibly a PAK file, but ignore that!). An AP file is basically the same as a ZIP file and can be opened in something like 7-zip. Opening it, you will find a further series of files and folders. If it's a route AP file (as this is) then you'll find quite a lot in there, if it's just a loco pack then there are fewer folders.
Rail Vehicles are in the "RailVehicles" folder and from there the separation is usually fairly intuitive.
Continuing where we left off...
The Blueprint ID is the pathname and filename of the blueprint for the rail vehicle we want to add. In this case the files are in an AP file - so open this with 7-zip (or your favourite ZIP explorer) and we find that the diesel locomotive we want can be found here inside the AP file:
RailVehicles\Diesel\SD40-2\Default\Engine\
Tip: a .ap file is just a renamed .zip file, so it should load fine in any ZIP tool. Personally I use 7-zip as it's fast and free - you can download it from www.7-zip.org
Inside this folder are a bunch of files, the ones we are looking for are .bin files and in this case there are two - the one we want is sd40_2.bin - for the purposes of our consist, we will put "xml" instead of "bin" though.
This means that the final blueprint ID will be:
RailVehicles\Diesel\SD40-2\Default\Engine\sd40_2.xml
Even though the file itself is actually a .bin file, the game will look for both the .xml and .bin files, but as the blueprint editor is intended to work with source files, it must have the xml file. If that doesn't make sense, don't worry, just go with it :)
The last option "Flipped" will flip the vehicle around so that it faces the other way. We'll leave it as it is for now.
Ok, so this is where we're at now:
At this point it's worth answering a couple of questions you might be thinking about...
Can I use vehicles from lots of different provider/product's?
Yes, as many as you want, you can mix a "Marias Pass" loco with a "Miami West Palm Beach" wagon and a "New York New Haven" wagon if you want! Just remember that the more you add, the more the game will have to load, since it loads the entirety of a provider/product when it accesses any part of one.
Do I need to unpack the AP file?
No, leave it exactly as it is.
That's the first entry on the consist done. Let's add a couple of wagons - click the Add Element button again.
We'll add a wagon from the same route just to make things easy, set up the same Provider and Product as before. Navigate back in to the AP file for New York New Haven and we can see that there are a number of wagon types, i'm going to go with the box car, so our blueprint folder is:
RailVehicles\Freight\BoxCar\Default\Wagon\
Inside here, there are a number of bin files, but two of them are the bogie definitions, leaving one which refers to the wagon itself. Don't forget to change "bin" to "xml" for the blueprint ID, meaning our Blueprint ID is therefore:
RailVehicles\Freight\BoxCar\Default\Wagon\box_car.xml
Let's see how our consist is looking now:
Click the Add Element button and expand everything out again, as if we were going to do it the same way we did the first one.
Now right click on the "Consist Entry" header of the FIRST wagon we added and select Copy. Now right click on the "Consist Entry" header of the NEW entry we just added (the one that is currently blank) and select Paste. That's the second wagon done, much easier.
Now that the rail vehicles themselves are done, let's go through the rest of the blueprint.
Loco name - let's make it the same as the existing Sd40-2 so that it simply adds to the list, which means it needs to have a Loco Name of "EMD SD40-2" - it is again essential that capitalisation matches.
Display Name - our consist is simply a couple of box cars so let's call it "2 Box cars".
Engine Type - Diesel.
I'll leave the era start and end years as they are.
Driving Engine Index we will leave as 0.
Valid Build and Drive Routes
For this, click the Add Element button and it will add a "Consist Valid Route" entry with a "Route GUID" entry. What you need to know now is what the GUID's are for the routes you want to add it to. I found an excellent post on the Steam Forums which lists all the routes (and many freeware routes) and their GUID's, you can find it here:
http://forums.steampowered.com/forums/showthread.php?t=3257269
Simply paste one Route GUID in to the entry box to enable this consist to appear as AI on that route. Let's add New York New Haven.
This means that our consist can now randomly appear as an AI consist on quick drives that happen on these two routes, but it won't appear on any others.
Drivable Consist - this is drivable, so tick the box.
Consist Type - there really isn't an ideal type in this box so i'm going to set it to Freight - Container. As I mentioned earlier, this relates to how the quick drives themselves are set up. You pick anything - this could be a "freight livestock" if you want, and then if you give "freight livestock" a chance of showing in the quick drive it will all simply work. Choosing a reasonably appropriate one just helps you create QD's that make sense and try to have the right trains in the right places. If you find there aren't any appropriate options then you can use one of the "custom" options but again, these are no good unless the QD itself offers a chance of the same ones appearing. If you're creating the consists AND the quick drives then that's ideal and you can create something really nice.
I would recommend that if you create a quick drive, you should document the types of consists you've used and their chances of appearing, that'll help anyone making new consists to ensure that they use the right types.
The last three settings relate to electric trains, if this was an ACS-64 then I would tick the "has pantograph" button but as it's a diesel, I will leave them all unticked.
That's it - our first consist has been created.
Press CTRL-S to save it (or go to the file menu and click Save).
It's important to double check all of the entries you've typed in, the process of exporting will not check to make sure you have put the right paths in because to do that you need the full asset source.
In the "Explorer" section where your new blueprint consist file is, right click on the file and select "Export" followed by "Export This Only". It's important to choose "Export This Only" because this option will not try to export anything else - and since we don't have the source for the locomotive and wagons that's a good thing! If you do have all the source because you're actually making the stock yourself then just export as normal and it will error check everything properly as it goes.
Now let's go in to the game and test it!
Once in the Quick Drive section, find the EMD SD40-2 entry and then see if your consist is present. If it is that's the first win. Select it and enter the quick drive. If it loads and then errors right at the end, it means one or more of the entries you've added for the blueprint id's or provider / products is incorrect - check it. You might get some help by enabling logging (detailed in an earlier blog post).
Once all is working you should now be in the game driving the consist you just made!
That's all you need to get started, you can now make any consist you like - but making a consist that has the same 120 wagons but one of 5 different loco's at the front would currently either mean duplicating that 120 wagons five times. Nightmare! This is where Consist Fragments come to the rescue in a big way!
In the same way we created a Consist Blueprint, you can create a Consist Fragment blueprint. I would strongly suggest a naming convention on the filenames so that fragments are easily identifyable, you could also put them in a sub-folder. I would suggest a prefix like "F-" or "Fragment-" just to be clear.
Inside the fragment blueprint is just the section of consist entries, so all those blueprint id's, providers, products etc and nothing else. You could make up a set of say 20 container wagons here or a 5 car passenger train (just the coaches).
Having saved and exported the fragment you can now use it in the main Consist Blueprint - set the provider and product to your provider and product (e.g. MattPeddlesden and QDStuff for my test example here) and then the blueprint ID simply points to the fragment. There is, however, a nice easy way to do this!
Open the Consist Blueprint you want to use the fragment in and add an element where the next wagon should be placed.
Right click on the Fragment filename in the Explorer pane, select Copy.
Now expand the blank consist entry and right click where it says "blueprint name" - and click Paste.
The Blueprint editor is clever enough to know how to interpret the location of the blueprint you copied and fill in all the blanks for this consist entry! That's the fragment added.
So if you defined say 10 coal cars, 10 auto racks, 15 low gons etc you could then add half a dozen different fragments and end up with a 100 car manifest train and still have a bunch of fragments you can chop and change around and re-use in other consists.
The other really nice thing about this reusability is that if, later, you find a better coal car, you can simply open each fragment that uses it and swap in the new car - and all of the consists which use those fragments will automatically reflect the changes.
It's been a long journey but we got to the end at last :)
In summary...
- You need to create a consist using the Blueprint Editor.
- You should create Consist Fragments for the commonly re-used portions.
- You should create Consist Blueprints to actually define the final consists.
- You can mix and match fragments and actual items of stock as much as you want.
- You can pull in stock from lots of different provider/products if you want.
- Set the consist type and valid routes to enable the consist to be seen in Quick Drive's as AI traffic.
- Set the Loco Name of the consist to chose what loco name it shows up as when a player is picking from the list, and I'd recommend you try and add your consists to existing loco name entries so that the list does not get bloated.
- Set the Display Name to represent what is unique about this consist, what actually is it.
- You can set up consists with only freight cars / wagons / coaches if you want, make sure not to check the Drivable box for these, but make sure you do set the valid routes and consist type and then they should show up as static items placed in yards and so forth.
- Do keep your own consist definitions in your own provider/product, it makes it easier for someone to update, remove etc than if you splat yours all over the main ones.
I look forward to seeing what you all do with this exciting feature :)
If you missed my video on creating quick drive scenarios then you can find it here on YouTube:
https://www.youtube.com/watch?v=uTSwEuWPZH8
Saturday, 25 April 2015
New Post Coming Soon
Just a short entry to say that this blog has not been forgotten :)
I recently did a tutorial on how to define your own Quick Drive scenario templates and there are a couple of topics that came out of it which are best served by a tutorial on here covering them in more detail.
Once i've got something written i'll get it posted up - hopefully in the next couple of days.
If there are topics you'd like to see covered then please do leave a comment and let me know, i'm struggling for things to say in the blog to be honest!
Sunday, 22 February 2015
TS2015 - Scenario Scripting in LUA Part 13 - Example Script
I've had a couple of requests to put the entire script from the YouTube video tutorial up so that it can be reviewed and understood in its entirety - so without further delay, here it is!
Note that I didn't use some of the techniques discussed here such as the _G[]() idea because the goal was to be quick and simple, but using this and the learnings in previous blog posts you should be able to use this in an effective way.
Note that I didn't use some of the techniques discussed here such as the _G[]() idea because the goal was to be quick and simple, but using this and the learnings in previous blog posts you should be able to use this in an effective way.
-- true/false defn
FALSE = 0
TRUE = 1

-- condition return values
CONDITION_NOT_YET_MET = 0
CONDITION_SUCCEEDED = 1
CONDITION_FAILED = 2

-- Message types
MT_INFO = 0
MT_ALERT = 1

MSG_TOP = 1
MSG_VCENTRE = 2
MSG_BOTTOM = 4
MSG_LEFT = 8
MSG_CENTRE = 16
MSG_RIGHT = 32

MSG_SMALL = 0
MSG_REG = 1
MSG_LRG = 2

function DisplayRecordedMessage( messageName )
  SysCall("RegisterRecordedMessage", "StartDisplay" .. messageName,
      "StopDisplay" .. messageName, 1);
end

function StartDisplayIntroText()
  SysCall ( "ScenarioManager:ShowInfoMessageExt", "Title of the box",
      "intromessage.html", 0, MSG_VCENTRE + MSG_CENTRE, MSG_REG, TRUE );
end

function StopDisplayIntroText()
end

function StartDisplayMoving()
  SysCall ( "ScenarioManager:ShowInfoMessageExt", "You're off!",
      "moving.html", 0, MSG_VCENTRE + MSG_CENTRE, MSG_REG, TRUE );
end

function StopDisplayMoving()
end

function StartDisplayOverspeed1()
  SysCall ( "ScenarioManager:ShowInfoMessageExt", "Too fast!",
      "overspeed1.html", 0, MSG_VCENTRE + MSG_CENTRE, MSG_REG, TRUE );
end

function StopDisplayOverspeed1()
end

function StartDisplayOverspeed2()
  SysCall ( "ScenarioManager:ShowInfoMessageExt", "Final warning!",
      "overspeed2.html", 0, MSG_VCENTRE + MSG_CENTRE, MSG_REG, TRUE );
end

function StopDisplayOverspeed2()
end

function OnEvent(event)
  if (event == "introtext") then
    DisplayRecordedMessage("IntroText");
  end

  if (event == "cinematic") then
    SysCall ( "CameraManager:ActivateCamera", "introcinematic", 0 );
  end

  if (event == "cabcamera") then
    SysCall ( "CameraManager:ActivateCamera", "CabCamera", 0 );
  end

  if (event == "startmovingcheck") then
    SysCall ( "ScenarioManager:BeginConditionCheck", "StartMovingCondition" )
  end

  if (event == "startoverspeedcheck") then
    SysCall ( "ScenarioManager:BeginConditionCheck", "OverspeedCondition" )
  end

  if (event == "starttoofastcheck2") then
    SysCall ( "ScenarioManager:BeginConditionCheck", "OverspeedCondition2" )
  end

  if (event == "starttoofastcheck3") then
    SysCall ( "ScenarioManager:BeginConditionCheck", "StopCondition" )
    SysCall ( "ScenarioManager:BeginConditionCheck", "OverspeedCondition3" )
  end
end

function TestCondition(condition)
  if (condition == "StartMovingCondition") then
    speed = SysCall ( "PlayerEngine:GetSpeed" );
    if (speed > 0.89) then
      DisplayRecordedMessage("Moving");
      return CONDITION_SUCCEEDED;
    end
    return CONDITION_NOT_YET_MET;
  end

  if (condition == "OverspeedCondition") then
    speed = SysCall("PlayerEngine:GetSpeed");
    if (speed > 8.904) then
      DisplayRecordedMessage("Overspeed1");
      SysCall ( "ScenarioManager:TriggerDeferredEvent", "starttoofastcheck2", 5 );
      return CONDITION_SUCCEEDED;
    end
    return CONDITION_NOT_YET_MET;
  end

  if (condition == "OverspeedCondition2") then
    speed = SysCall("PlayerEngine:GetSpeed");
    if (speed > 8.904) then
      DisplayRecordedMessage("Overspeed2");
      SysCall ( "PlayerEngine:SetControlValue", "Regulator", 0, 0);
      SysCall ( "PlayerEngine:SetControlValue", "TrainBrakeController", 0, 1);
      SysCall ( "PlayerEngine:SetControlValue", "VirtualThrottle", 0, 0);
      SysCall ( "PlayerEngine:SetControlValue", "VirtualBrake", 0, 1);
      SysCall ( "ScenarioManager:LockControls");
      SysCall ( "ScenarioManager:TriggerDeferredEvent", "starttoofastcheck3", 5 );
      return CONDITION_SUCCEEDED;
    end
    return CONDITION_NOT_YET_MET;
  end

  if (condition == "StopCondition") then
    speed = SysCall("PlayerEngine:GetSpeed");
    if (speed < 0.1) then
      SysCall("ScenarioManager:UnlockControls");
      return CONDITION_SUCCEEDED;
    end
    return CONDITION_NOT_YET_MET;
  end

  if (condition == "OverspeedCondition3") then
    speed = SysCall("PlayerEngine:GetSpeed");
    if (speed > 8.904) then
      SysCall ( "ScenarioManager:TriggerScenarioFailure",
          "I give up, you're out of here! Too much fast driving! - DarknezzMonster" );
      return CONDITION_SUCCEEDED;
    end
    return CONDITION_NOT_YET_MET;
  end
end
Saturday, 21 February 2015
TS2015 - Scenario Scripting in LUA Part 12 - Video
Apologies for the long time between articles!
In this article i'm going to show you how to incorporate videos in to your scenarios, done correctly they can really elevate your scenarios to a completely different level.
The overall API for playing videos is almost identical to the API for playing sounds - so if you haven't yet read the previous blog post on the subject then now would be a great time to do that.
At the top of your LUA script file you're going to want to drop in some definitions, just to make the rest of the script a bit easier to read:
Note: You may already have FALSE and TRUE defined, in which case there's no need to duplicate them here.
The calls to handle videos are as follows:
Start a video playing:
Check to see if a video is playing:
Stop a video from playing:
Let's put it in a small example to provide some context:
Here, i'm defining a trigger event "Start" (which should be initiated from a Trigger instruction in the scenario definition) and this will play a video, full screen.
Just as with audio, the call to play a video will return immediately and let the video carry on playing in the background, that's the main reason for the "IsVideoMessagePlaying" and "StopVideoMessage" calls. I'll show them in action in a moment.
After the Filename, the next one tells the game how and where you want the video displayed. The options are Fullscreen (0), Front and Center (1), and Video Call (2). I've defined some constants above so that it's easier to see what it is doing rather than passing plain numbers in (never do that, trust me!).
Full Screen puts the video full screen, just as it says it will. It will also include an X in the top right that allows the player to abort playback of the video if they wish. In the screenshot below you can see it has completely filled the game screen.
Front and Center gives you a video playback which does not fill the screen and therefore allows some context from within the game to still be seen, but it is meant to still command the users attention fully and is of sufficient size it can still contain some detail.
Finally, Video Call is intended to show in the top left corner somewhat like if you had a video call going on with someone. You could use this for giving brief snippets of information, perhaps a news bulletin about something that's just happened (based on the players action) or something similar.
The next option is either TRUE (1) or FALSE (0) and this tells the game whether to pause in-game action or leave it running. If you're going to get in the way of the user such as a full screen video then I'd suggest pausing the game is a good idea. If it's a video call, then you probably don't want to pause it so that it feels more like something that is happening as part of the game play.
The next option tells the game what kinds of controls to put on the video, do you want them to be able to pause it? skip to a particular bit? or stop it? There are four constants defined for this in my example. NO_CONTROLS (0) means show nothing, and is used in all the above three screenshot examples. PLAYPAUSE (1), STOP (2) and SEEK (4) add the relevant controls that you would expect. If you want to add more than one control, simply add them together like this:
This would give you something like this::
The final parameter is always a zero.
I use FFMpeg2Theora to do my conversions, available here, once installed you can run it with this command line to get the right format:
Here i've used an mp4 video because that's what I exported from my video editing suite, the result will go out as myvideo.ogv .
The number at the end is the quality level, 10 is the maximum and reducing it can make a huge difference to the file size - as well as a huge difference to the quality. You will likely find that you can drop it down one or two settings before you even notice a difference and then it will drop off quickly. Find that right setting for your video that means you can get the file size down as far as possible while still remaining good quality.
Place the videos in the localised language folder, the same as the audio files. So this would be in the "en" folder for English users, for example.
This example is somewhat contrived to try and fit a few different things in to a small space but it should give you the "snippets" to do what you want to do.
In the scenario instructions we're triggering "Start", which ultimately calls OnEventStart().
In OnEventStart() we find out if the video is currently playing and if so, we stop it. It's highly unlikely that would be the case here, but normally you might find a place where there's a chance a video is already playing and now as a result of a more gameplay based event you need to play a video so the first thing you do is make sure that nothing else is playing first.
We then kick off playing our video, and then finally start a condition check called HasItStoppedYet.
The game will now play the video, and while the user is enjoying this video the game will now be calling TestConditionHasItStoppedYet over and over again, each time it will find out if the video is currently playing. At some point this is going to return FALSE because our video finally finished playing and when this happens we manually trigger another event NextStep.
When OnEventNextStep runs, it displays a message to the user, presumably saying "right, now get moving". Had you just tried to put the message box up, it would have appeared over or simply interrupted the video. In this way, you remain fully in control of when things are presented to the user.
In this article i'm going to show you how to incorporate videos in to your scenarios, done correctly they can really elevate your scenarios to a completely different level.
The overall API for playing videos is almost identical to the API for playing sounds - so if you haven't yet read the previous blog post on the subject then now would be a great time to do that.
At the top of your LUA script file you're going to want to drop in some definitions, just to make the rest of the script a bit easier to read:
FULLSCREEN = 0
FRONT_AND_CENTER = 1
CALL = 2

FALSE = 0
TRUE = 1

NO_CONTROLS = 0
PLAYPAUSE = 1
STOP = 2
SEEK = 4
Note: You may already have FALSE and TRUE defined, in which case there's no need to duplicate them here.
The calls to handle videos are as follows:
Start a video playing:
SysCall("ScenarioManager:PlayVideoMessage", "2013_startup.ogv", FRONT_AND_CENTER, FALSE, NO_CONTROLS,0)
Check to see if a video is playing:
SysCall("ScenarioManager:IsVideoMessagePlaying", "2013_startup.ogv")
Stop a video from playing:
SysCall("ScenarioManager:StopVideoMessage", "2013_startup.ogv")
Let's put it in a small example to provide some context:
function OnEvent(event)
  _G["OnEvent" .. event]();
end

function OnEventStart()
  SysCall("ScenarioManager:PlayVideoMessage", "2013_startup.ogv", FULLSCREEN, FALSE, NO_CONTROLS,0)
end
Here, i'm defining a trigger event "Start" (which should be initiated from a Trigger instruction in the scenario definition) and this will play a video, full screen.
Just as with audio, the call to play a video will return immediately and let the video carry on playing in the background, that's the main reason for the "IsVideoMessagePlaying" and "StopVideoMessage" calls. I'll show them in action in a moment.
Parameters
There are a number of parameters to the PlayVideoMessage function that are interesting.After the Filename, the next one tells the game how and where you want the video displayed. The options are Fullscreen (0), Front and Center (1), and Video Call (2). I've defined some constants above so that it's easier to see what it is doing rather than passing plain numbers in (never do that, trust me!).
Full Screen puts the video full screen, just as it says it will. It will also include an X in the top right that allows the player to abort playback of the video if they wish. In the screenshot below you can see it has completely filled the game screen.
 |
| Full Screen Playback |
 |
| Front and Center Playback |
 | ||
| Video Call Playback |
The next option is either TRUE (1) or FALSE (0) and this tells the game whether to pause in-game action or leave it running. If you're going to get in the way of the user such as a full screen video then I'd suggest pausing the game is a good idea. If it's a video call, then you probably don't want to pause it so that it feels more like something that is happening as part of the game play.
The next option tells the game what kinds of controls to put on the video, do you want them to be able to pause it? skip to a particular bit? or stop it? There are four constants defined for this in my example. NO_CONTROLS (0) means show nothing, and is used in all the above three screenshot examples. PLAYPAUSE (1), STOP (2) and SEEK (4) add the relevant controls that you would expect. If you want to add more than one control, simply add them together like this:
SysCall("ScenarioManager:PlayVideoMessage", "2013_startup.ogv", FRONT_AND_CENTER, FALSE, (PLAYPAUSE+STOP+SEEK),0)
This would give you something like this::
 |
| Front and Center with all controls enabled along the bottom of the video |
Format
The format of the video is an Ogg Vorbis ".ogv" video. You will need to create your video and export it in some format using your preferred editing tool and then if it won't export to Ogv then you'll need to use an additional step to convert it. As a reference example, the 2013_startup.ogv used as part of the start-up sequence of the game is in the correct format. You can use this to confirm you're calling the video correctly and it is working, and then drop your own video in afterwards. You can find this video in the data\videos folder.I use FFMpeg2Theora to do my conversions, available here, once installed you can run it with this command line to get the right format:
ffmpeg2theora-0.29.exe myvideo.mp4 -vcodec libtheora -acodec libvorbis -v 10
Here i've used an mp4 video because that's what I exported from my video editing suite, the result will go out as myvideo.ogv .
The number at the end is the quality level, 10 is the maximum and reducing it can make a huge difference to the file size - as well as a huge difference to the quality. You will likely find that you can drop it down one or two settings before you even notice a difference and then it will drop off quickly. Find that right setting for your video that means you can get the file size down as far as possible while still remaining good quality.
Place the videos in the localised language folder, the same as the audio files. So this would be in the "en" folder for English users, for example.
Bigger Example
So here's a bigger example showing how you can use conditions to work out when to continue with the scenario.function OnEvent(event) _G["OnEvent" .. event](); end function TestCondition(condition) _G["TestCondition" .. condition](); end function OnEventStart() videoPlaying = SysCall("ScenarioManager:IsVideoMessagePlaying", "2013_startup.ogv") if (videoPlaying == TRUE) then SysCall("ScenarioManager:StopVideoMessage", "2013_startup.ogv") end SysCall("ScenarioManager:PlayVideoMessage", "2013_startup.ogv", FULLSCREEN, FALSE, NO_CONTROLS,0) SysCall("ScenarioManager:BeginConditionCheck", "HasItStoppedYet") end function OnEventNextStep() SysCall("ScenarioManager:ShowInfoMessageExt", "Get moving", "moving.html", 10, MSG_TOP + MSG_TOP, MSG_SMALL, TRUE); end function TestConditionHasItStoppedYet() videoPlaying = SysCall("ScenarioManager:IsVideoMessagePlaying", "2013_startup.ogv") if (videoPlaying == FALSE) then OnEventNextStep() end end
This example is somewhat contrived to try and fit a few different things in to a small space but it should give you the "snippets" to do what you want to do.
In the scenario instructions we're triggering "Start", which ultimately calls OnEventStart().
In OnEventStart() we find out if the video is currently playing and if so, we stop it. It's highly unlikely that would be the case here, but normally you might find a place where there's a chance a video is already playing and now as a result of a more gameplay based event you need to play a video so the first thing you do is make sure that nothing else is playing first.
We then kick off playing our video, and then finally start a condition check called HasItStoppedYet.
The game will now play the video, and while the user is enjoying this video the game will now be calling TestConditionHasItStoppedYet over and over again, each time it will find out if the video is currently playing. At some point this is going to return FALSE because our video finally finished playing and when this happens we manually trigger another event NextStep.
When OnEventNextStep runs, it displays a message to the user, presumably saying "right, now get moving". Had you just tried to put the message box up, it would have appeared over or simply interrupted the video. In this way, you remain fully in control of when things are presented to the user.
Tuesday, 17 February 2015
TS2015 - Scenario Scripting in LUA Part 11 - Audio
Audio is a really great way to kick your scenarios up a notch, you could use it to play some instructions for the user or to have scenario specific audio playing such as station announcements or other such things. It's up to you to record the audio though of course!
In LUA, managing Audio is done through three commands:
PlayDialogSound will begin playing the audio, it returns immediately so your script can continue doing things while the audio is playing.
This is great because it means you can get on and do other things, let the player carry on driving and so forth however if you want to play something straight afterwards, or if you want to play something new then it's good to know if something is already still playing.
IsDialogSoundPlaying will return "TRUE" if the audio is playing, and then you can issue a StopDialogSound to stop it playing.
You must always stop an audio file playing before you start another one, or the new one is simply ignored.
You can use this in a number of ways - when you arrive at a station perhaps an audio file plays something that has had suitable echo applied which sounds like a station announcement. You could even work out how late the player is and play "sorry for the late arrival of this train" if late, or "the on-time service on platform 2..." if they're reasonably on time.
Using the functions you can even chain things together to be a little more dynamic, for example, let's say that you want to read out the current speed at some point - you would work out what files you're going to play, e.g. "fifty.wav" and "six.wav", then you would play the first one, use a condition to wait for it to finish (ie. the condition would keep calling IsDialogSoundPlaying(fifty.wav) ) - and then kick off "six.wav" afterwards. That way you can end up with some that says "you went through the checkpoint at... fifty...six...miles per hour". This is basically the same way that telephone systems read out things like "you have...fifty...six... new voice mails".
So, where do you place the files?
Remember back when I covered where you place HTML files? It's exactly the same. They go in a localised folder name, so english sound files go in an "En" folder, that way the right sounds will be played depending on the preferred language of the person playing the scenario!
It's simple, it's easy to use, and you can use it to great effect in your scenarios!
In LUA, managing Audio is done through three commands:
SysCall("ScenarioManager:PlayDialogueSound", "test.wav")

SysCall("ScenarioManager:StopDialogSound", "test.wav")

SysCall("ScenarioManager:IsDialogSoundPlaying", "test.wav")
PlayDialogSound will begin playing the audio, it returns immediately so your script can continue doing things while the audio is playing.
This is great because it means you can get on and do other things, let the player carry on driving and so forth however if you want to play something straight afterwards, or if you want to play something new then it's good to know if something is already still playing.
IsDialogSoundPlaying will return "TRUE" if the audio is playing, and then you can issue a StopDialogSound to stop it playing.
You must always stop an audio file playing before you start another one, or the new one is simply ignored.
You can use this in a number of ways - when you arrive at a station perhaps an audio file plays something that has had suitable echo applied which sounds like a station announcement. You could even work out how late the player is and play "sorry for the late arrival of this train" if late, or "the on-time service on platform 2..." if they're reasonably on time.
Using the functions you can even chain things together to be a little more dynamic, for example, let's say that you want to read out the current speed at some point - you would work out what files you're going to play, e.g. "fifty.wav" and "six.wav", then you would play the first one, use a condition to wait for it to finish (ie. the condition would keep calling IsDialogSoundPlaying(fifty.wav) ) - and then kick off "six.wav" afterwards. That way you can end up with some that says "you went through the checkpoint at... fifty...six...miles per hour". This is basically the same way that telephone systems read out things like "you have...fifty...six... new voice mails".
So, where do you place the files?
Remember back when I covered where you place HTML files? It's exactly the same. They go in a localised folder name, so english sound files go in an "En" folder, that way the right sounds will be played depending on the preferred language of the person playing the scenario!
It's simple, it's easy to use, and you can use it to great effect in your scenarios!
Sunday, 15 February 2015
TS2015 - Scenario Scripting in LUA Part 10 - Dynamic Weather
I'm going to split this topic in to two bits, first i'm going to cover how you actually make use of extended weather blueprints and then second i'll talk about how to actually make those blueprints. That initially might sound like the wrong way around, however since there are extended weather blueprints already provided in some route packages you could use those in scenarios without having to think about making new weather blueprints at all, easier but less flexible.
I'm going to refer to the Extended Weather Blueprint that is supplied with Pacific Surfliner in this example, so if you have that route then enable its assets for the scenario (the same way you would if you wanted to use a loco from that pack). If you don't have Pacific Surfliner then you will likely have to skip to the next section about creating your own Extended Weather Blueprint.
In order to use this Extended Weather Blueprint, having enabled it, we must then tell the scenario specifically to use it. You can only point a scenario to one single Extended Weather Blueprint.
When you first edit a scenario you can see the scenario properties (such as title, time of day, season etc) on the top right fly-out. At the top of this, you will see a picture which looks like some gears, this is the option that takes you to more advanced settings, click it.

This shows the next "tab" - to return to the normal one, click the orange train icon.
From this tab you can use the drop-down box to select from the available Extended Weather Blueprints - in this case, I'm seeing the two that Pacific Surfliner contains.

Within an Extended Weather Blueprint there are defined a number of "Chains" which define a sequence of weather patterns to apply, each Chain has a name, and it is this chain that the LUA script must activate.
There are three weather chains defined in the Pacific Surfliner weather pattern:
Within our LUA script we simply need to tell the game to start one of these sequences, as follows:
This will cause the weather sequence defined by this chain to immediately start executing, this could cause fog to change, the sky colour to change, rain to start or change intensity, flashes in the sky, it can even place textures in the world to act as lightning bolts or rainbows.
To create these blueprints you will need to set up a source folder for your assets if you do not already have one. Within the Train Simulator 2015 home directory, you need to create a Source folder along with another folder for the "Provider" name and another for the "Product" name. For example, Provider might be your name or some handle you go by online. Product could just be "ScenarioAssets". Beneath there, create a Weather folder, and inside that create an Audio folder.
When you're done, it should look like this:

Note I've used "MattPeddlesden" as my "Provider" and "ScenarioSupport" as my "Product". If you're building this as part of a bigger pre-existing route or loco pack then you can of course just drop these assets right in there rather than creating something new.
From the RailWorks home directory, run BlueprintEditor2.exe and you will see something similar to this:

From here, we can start creating the blueprint.
Right click on the "Weather" folder, select "Add" and then "New Item".
From the dialog that pops up:

Select "Blueprint" then "Weather pattern extension blueprint" and enter a sensible name for the file, it must end with ".xml". Click OK.
It will now load the blank blueprint in ready for you to edit it.
The blueprint is split in to a number of sections. Before we go any further, enter something in to the "Display Name" field. I've entered "MyCustomWeatherPattern".

As with any design process, the first place to start is with a pencil and paper. What do we want this to do? We can set up weather chains that do multiple things one after the other, or we can split them out in to their own chains and call them up as we want. For this tutorial, let's make it four separate chains that each do one thing. I'll leave it to you to get creative!
Chain 1 "Rain" - Light rain
Chain 2 "Foggy Rain" - Step 2: Light rain + Close fog
Chain 3 "Foggy Downpour" - Step 3: Heavy rain + Close fog
If you want things to happen in specific locations (e.g. start raining just at the time when you have the heaviest load on the steepest track perhaps!) then set up chains that you can start at specific locations via triggered events. If you want sequences that happen over a period of fixed time, you can set up chains to do multiple things in sequence and then simply trigger it at an appropriate point in the script, so you really do have a lot of flexibility.
We need to attack this problem by breaking it down in to component parts defined by the blueprint, which means we need to define the clouds and the precipitation separately, then tie them together in a "weather type" (which adds more options on top) and then assemble chains that the LUA script can call.

Set the name to something appropriate, we're going to just call this one "thick clouds".
When a route is set up, the route designer will set up four different sky dome textures and using the values in "Cloud Description" you can choose which ones will be shown by setting them to 1 or 0.
The Colour Darkening Intensity allows you to make noticeable changes to the ambient lighting, particularly useful during a heavy storm where you might want to set it to 1.5 or even 2, at this point headlights become more visible and can provide a much more noticeable environmental change.
My example weather blueprint i've set up three cloud types:

"Thick Clouds" will be our normal sky, we'll then change to "Storm Clouds" for when it's raining, which will also dark the world, and then "Dark Storm Clouds" for when the rain really kicks in to high gear.
 You will need to create a small texture for the rain drop using your favouroute paint application (I use Paint.NET) , 64x64 pixels in size. The "split raindrop" used in many weather patterns, looks something like this - the link to download the file is here and then use a tool like "RWAceTool" (available from many sites online including UKTrainSim here - RWAceTool on UKTS. Note that i've made the texture show up here with a black background since with only alpha transparency, it would otherwise be rather hard to see.
This texture must be an ACE file and it must be placed in the Weather folder. From here, we can start using it.
Here's an example of one set-up of the precipitation, you can tweak values such as "alpha top", "alpha bottom" and "particle stream multiplier" to affect how the rain looks - generally, bigger numbers mean "more".
 I defined one called "intenserain" and one called "lightrain" - the only difference with "lightrain" is that the particle streak multiplier is 3, and the alpha bottom is 40.
You can also see above where (and how) the raindrop texture is shown.
Now that we have our clouds and precipitation, we need to set up some weather types. There are essentially three different weather types that i'm going to define in this example (of course you can do however many you wish!) - but in order to make it work the way I want, I actually need to double some of them up, i'll explain why as we go.
Whether you need to double up on your weather types depends on whether you want to have weather changes script-controlled, or if you just want to kick off a timed sequence from the script. If it's fully script controlled, you need to essentially have "Start" and "Continue" weather types with a couple of small changes, if it's all done within a single chain then you can keep things simpler.
I'm going to be showing the more complex case, where it's entirely script controlled, so simply note that you can cut some steps out if you put all your weather changes in one chain.
In our weather types, the three main types we want to define are:

So what is this defining?
You can set up wind direction and speed, which will affect smoke particle effects. You will refer to the precipitation entries you set up previously, and then say how much rain (0.1 is light, 1.0 is heavy), and how fast the rain is travelling. The Glass Weather Boost we'll see in a moment, but basically this says whether there's more rain hitting the windscreen to create a much more intense effect.
You can also set up fog - we'll do that next too.
Blend times i'll cover in a moment as there are numerous blend times to consider in order to set things up correctly.
This is also where you set up the reference the cloud types you configured earlier.
The last parameter "audio" we'll look at in a future tutorial, but essentially if you want lightning cracks and thunder (Or indeed any other audio) then this is where you tell the weather blueprint how to access the audio blueprint that has the sound set-up in it.
So that's a simple example which hs no fog and sets up some light rain. Let's look at the next one, which adds fog:

This example pushes up the precipitation density a little, basically making it rain a bit harder outside the train. This time we also tick the "fog override" box and set up some settings which control what colour the fog is, how transparent it is, how far away does it start and when does it end. I've also changed the sky dome so that it will use a different cloud formation.
Lastly, let's make it rain really heavily:
 In this example you can see that the fog is similar, but i've drawn it in closer. I've also set the precipitation density to its maximum value of 1, increase the speed of it, and boosted the glass weather effect. At this point, most wipers will not be able to even remotely keep up with the rain, it's really quite unpleasant!
So that's the main three weather types.
The other three weather types i've defined are used for merging between them, they are identical but they have got a "blend in time" of 0 minutes, making them instant. In the next section, where we finally set up the triggered event chains, i'll cover why we need these and how all the blend times work.
In the Triggered Weather Event Chain section, click Add Element.
I'm going to start the sequence off by just making it light rain, so the first chain will be called "Rain" and will start the "Rain" weather type, as follows:

The "Name" is the name that we'll reference in the LUA script. Loop mode is set up to be "Hold end" which should keep it going after the chain finishes - though i've had mixed results with this, which is why the duration of the weather type event is set to 999 minutes. Inside the chain, you then set up a sequence of weather types - in my case i've just put one, but if you wanted to put a longer sequence of timed events together this is where you do it, just keep adding events and noting how long each one should last.
The blend out time is set to a very small number, let's look at the next chain and then we'll see how you get from chain to the next.
In the scenario set-up, i've set it such that when you go over a waypoint somewhere down the line it simply causes the next event to occur, this means i've got complete control over the weather happening at the right point in the scenario, so if I take a longer or shorter time to get to that point, it will still always start raining (or whatever) once I go past it. This may or may not be useful - if you want specifically to have just a timed sequence of weather that means that the player is encouraged to get a move on to ensure they're off a hill before a storm starts, then you would just put everything in a single timed chain. If you want to ensure that they always get a storm when they hit a hill, to make climbing the hill more challenging, then you want scripted control.
So let's take a look at the next sequence:
 The main difference here is that we have TWO weather types in this sequence, so now we can talk about how blending works between the sequences.
When you kick a weather sequence off using a LUA script command, it will "blend in" to the first weather type, and then remain there until that weather types "duration" is expired. At that point, it will "blend in" to the next weather type and so forth. Once it runs out of weather types it will refer to "loop" mode to find out what to do next. It will always blend from the state it's in, to the next one. If it's set to "stop" then it will take "blend out" minutes to then go back to the scenario standard weather pattern.
If a weather chain is currently running when you tell it to start another one, it will take "blend out" minutes to blend the existing weather chain out before beginning the next one.
This presents us with a big problem if we are in the middle of a foggy thunderstorm and then we switch to the next weather chain and it wants to then gently take us out of the thunderstorm - because the first thing that happens is the game will blend it out to whatever the default weather is and then blend back in to the new weather. In some cases this might be exactly what you're looking for, but in my case it wasn't - and that's why I had to add some extra weather types.
So we started the scenario with a nice sunny day, the we started "Rain" and over the course of a minute or so it started raining. Now we've hit the next marker and we want to go from "rain" to "foggyrain" without going back to "sunny". We set the "blend out time" of "rain" to be extremely short - so it will go back to sunny instantly, then the "Rain2" blueprint has a 0 minutes so it will instantly go back to raining again, which will last for about 6 seconds before it then begins a gentle fade over a minute or so towards foggy rain. This isn't ideal, it means that if you're looking, you'll notice a very tiny flash as the weather system goes back to sunny and then back to raining, however this can just as easily look like a lightning flash too - so I leave it to you to creatively decide whether you like that approach or not.
Let's look at the next chain:
 In this sequence we follow the same pattern, transitioning from Foggy Rain to Foggy Downpour using the same sequence of two chains.
The final chain, then, drops us back to Raining and then fades back to the sunny weather:
 In this chain, the "Rain" sequence means it will actually blend from "foggy downpour" back to "rain", which might confuse you in to thinking it's a "blend out" time - but always think about blending in as going in to a new weather, not necessarily a worse one, and blend out time as returning to "default" weather. The blend-in time for "Rain" is set to 1 minute in the weather type, so it'll take about a minute to lighten the weather, draw back the fog, lighten the world up and reduce the amount of rain. We'll then wait a further minute or so at this level, and then the duration will expire so the chain will begin then to fade back out using the "blend out" time of 3 minutes - this means that over the course of 5 minutes from when this chain starts, the horrific weather will draw back to light rain and then draw back to sunny with clear skies.
Once you've set it up, right click on the weather blueprint in the left hand pane (the one that looks like an Explorer folder tree) and select Export, followed by Export with References.

You should see some output in the lower pane and it should end by saying "==== Export Succeeded ====" - if it doesn't then go back and check. You should also see any error messages reported in that output window as well.
In the scenario i've set up a bunch of "stop at" instructions, each one with a minimum speed of 1mph (which turns them in to go-via instructions, but allows me to put a trigger on them). Here's an example of how I set one of them up:
 The important bit is near the bottom where it says "Weather1" - this is where you can trigger a script event to occur on successful completion of an instruction. The box directly to the right is the event to trigger if the player fails to complete the instruction successfully. So here you can see that in my first waypoint at Haymarket, I trigger "Weather1", this will go to the script and the script above will then execute the "Rain" weather sequence.
I have not covered the "Location" events, this is where you can add lightning bolts in the sky, rainbows, audio for thunder claps and also flash the sky. I think this tutorial is definitely long enough for now, so i'll come back and do Location events in a future tutorial, perhaps once i've had some feedback on how people feel about this one.
When I set the blog up, it was intended to be only the most basic parts of scripting capable of accessing with the sole goal of enhancing scenarios. This is one of the most complex examples because it involves you going in to the blueprint editor, this is not going to be a problem for anyone familiar with content creation piplines in Train Simulator but for the average user I expect this to be something you go in to with some degree of trepidation. I hope that i've covered it with enough detail to show that it's not too hard and the results are clearly very well worth the effort.
Using Extended Weather Blueprints
I'm going to refer to the Extended Weather Blueprint that is supplied with Pacific Surfliner in this example, so if you have that route then enable its assets for the scenario (the same way you would if you wanted to use a loco from that pack). If you don't have Pacific Surfliner then you will likely have to skip to the next section about creating your own Extended Weather Blueprint.
In order to use this Extended Weather Blueprint, having enabled it, we must then tell the scenario specifically to use it. You can only point a scenario to one single Extended Weather Blueprint.
When you first edit a scenario you can see the scenario properties (such as title, time of day, season etc) on the top right fly-out. At the top of this, you will see a picture which looks like some gears, this is the option that takes you to more advanced settings, click it.
This shows the next "tab" - to return to the normal one, click the orange train icon.
From this tab you can use the drop-down box to select from the available Extended Weather Blueprints - in this case, I'm seeing the two that Pacific Surfliner contains.
Within an Extended Weather Blueprint there are defined a number of "Chains" which define a sequence of weather patterns to apply, each Chain has a name, and it is this chain that the LUA script must activate.
There are three weather chains defined in the Pacific Surfliner weather pattern:
- FirstChain
- SecondChain
- FinalStorm
Within our LUA script we simply need to tell the game to start one of these sequences, as follows:
SysCall ( "WeatherController:SetCurrentWeatherEventChain", "FirstChain");
This will cause the weather sequence defined by this chain to immediately start executing, this could cause fog to change, the sky colour to change, rain to start or change intensity, flashes in the sky, it can even place textures in the world to act as lightning bolts or rainbows.
Creating Extended Weather Blueprints
To create these blueprints you will need to set up a source folder for your assets if you do not already have one. Within the Train Simulator 2015 home directory, you need to create a Source folder along with another folder for the "Provider" name and another for the "Product" name. For example, Provider might be your name or some handle you go by online. Product could just be "ScenarioAssets". Beneath there, create a Weather folder, and inside that create an Audio folder.
When you're done, it should look like this:
Note I've used "MattPeddlesden" as my "Provider" and "ScenarioSupport" as my "Product". If you're building this as part of a bigger pre-existing route or loco pack then you can of course just drop these assets right in there rather than creating something new.
From the RailWorks home directory, run BlueprintEditor2.exe and you will see something similar to this:
From here, we can start creating the blueprint.
Right click on the "Weather" folder, select "Add" and then "New Item".
From the dialog that pops up:
Select "Blueprint" then "Weather pattern extension blueprint" and enter a sensible name for the file, it must end with ".xml". Click OK.
It will now load the blank blueprint in ready for you to edit it.
The blueprint is split in to a number of sections. Before we go any further, enter something in to the "Display Name" field. I've entered "MyCustomWeatherPattern".
As with any design process, the first place to start is with a pencil and paper. What do we want this to do? We can set up weather chains that do multiple things one after the other, or we can split them out in to their own chains and call them up as we want. For this tutorial, let's make it four separate chains that each do one thing. I'll leave it to you to get creative!
Chain 1 "Rain" - Light rain
Chain 2 "Foggy Rain" - Step 2: Light rain + Close fog
Chain 3 "Foggy Downpour" - Step 3: Heavy rain + Close fog
If you want things to happen in specific locations (e.g. start raining just at the time when you have the heaviest load on the steepest track perhaps!) then set up chains that you can start at specific locations via triggered events. If you want sequences that happen over a period of fixed time, you can set up chains to do multiple things in sequence and then simply trigger it at an appropriate point in the script, so you really do have a lot of flexibility.
We need to attack this problem by breaking it down in to component parts defined by the blueprint, which means we need to define the clouds and the precipitation separately, then tie them together in a "weather type" (which adds more options on top) and then assemble chains that the LUA script can call.
Clouds
Set the name to something appropriate, we're going to just call this one "thick clouds".
When a route is set up, the route designer will set up four different sky dome textures and using the values in "Cloud Description" you can choose which ones will be shown by setting them to 1 or 0.
The Colour Darkening Intensity allows you to make noticeable changes to the ambient lighting, particularly useful during a heavy storm where you might want to set it to 1.5 or even 2, at this point headlights become more visible and can provide a much more noticeable environmental change.
My example weather blueprint i've set up three cloud types:
"Thick Clouds" will be our normal sky, we'll then change to "Storm Clouds" for when it's raining, which will also dark the world, and then "Dark Storm Clouds" for when the rain really kicks in to high gear.
Precipitation
Precipitation will let you set up a number of different things including the textures for the rain drops, snow flakes, or whatever else you want to fall from the sky. It is only an ALPHA texture however so I think you'll have problems trying to make cats and dogs actually fall from the sky!You will need to create a small texture for the rain drop using your favouroute paint application (I use Paint.NET) , 64x64 pixels in size. The "split raindrop" used in many weather patterns, looks something like this - the link to download the file is here and then use a tool like "RWAceTool" (available from many sites online including UKTrainSim here - RWAceTool on UKTS. Note that i've made the texture show up here with a black background since with only alpha transparency, it would otherwise be rather hard to see.This texture must be an ACE file and it must be placed in the Weather folder. From here, we can start using it.
Here's an example of one set-up of the precipitation, you can tweak values such as "alpha top", "alpha bottom" and "particle stream multiplier" to affect how the rain looks - generally, bigger numbers mean "more".
You can also see above where (and how) the raindrop texture is shown.
Weather Type
Now that we have our clouds and precipitation, we need to set up some weather types. There are essentially three different weather types that i'm going to define in this example (of course you can do however many you wish!) - but in order to make it work the way I want, I actually need to double some of them up, i'll explain why as we go.
Whether you need to double up on your weather types depends on whether you want to have weather changes script-controlled, or if you just want to kick off a timed sequence from the script. If it's fully script controlled, you need to essentially have "Start" and "Continue" weather types with a couple of small changes, if it's all done within a single chain then you can keep things simpler.
I'm going to be showing the more complex case, where it's entirely script controlled, so simply note that you can cut some steps out if you put all your weather changes in one chain.
In our weather types, the three main types we want to define are:
- Rain
- FoggyRain
- FoggyDownpour
So what is this defining?
You can set up wind direction and speed, which will affect smoke particle effects. You will refer to the precipitation entries you set up previously, and then say how much rain (0.1 is light, 1.0 is heavy), and how fast the rain is travelling. The Glass Weather Boost we'll see in a moment, but basically this says whether there's more rain hitting the windscreen to create a much more intense effect.
You can also set up fog - we'll do that next too.
Blend times i'll cover in a moment as there are numerous blend times to consider in order to set things up correctly.
This is also where you set up the reference the cloud types you configured earlier.
The last parameter "audio" we'll look at in a future tutorial, but essentially if you want lightning cracks and thunder (Or indeed any other audio) then this is where you tell the weather blueprint how to access the audio blueprint that has the sound set-up in it.
So that's a simple example which hs no fog and sets up some light rain. Let's look at the next one, which adds fog:
This example pushes up the precipitation density a little, basically making it rain a bit harder outside the train. This time we also tick the "fog override" box and set up some settings which control what colour the fog is, how transparent it is, how far away does it start and when does it end. I've also changed the sky dome so that it will use a different cloud formation.
Lastly, let's make it rain really heavily:
So that's the main three weather types.
The other three weather types i've defined are used for merging between them, they are identical but they have got a "blend in time" of 0 minutes, making them instant. In the next section, where we finally set up the triggered event chains, i'll cover why we need these and how all the blend times work.
Triggered Weather Event Chains
Now that we've set up all the resources for the weather patterns, it's time to link them together.In the Triggered Weather Event Chain section, click Add Element.
I'm going to start the sequence off by just making it light rain, so the first chain will be called "Rain" and will start the "Rain" weather type, as follows:
The "Name" is the name that we'll reference in the LUA script. Loop mode is set up to be "Hold end" which should keep it going after the chain finishes - though i've had mixed results with this, which is why the duration of the weather type event is set to 999 minutes. Inside the chain, you then set up a sequence of weather types - in my case i've just put one, but if you wanted to put a longer sequence of timed events together this is where you do it, just keep adding events and noting how long each one should last.
The blend out time is set to a very small number, let's look at the next chain and then we'll see how you get from chain to the next.
In the scenario set-up, i've set it such that when you go over a waypoint somewhere down the line it simply causes the next event to occur, this means i've got complete control over the weather happening at the right point in the scenario, so if I take a longer or shorter time to get to that point, it will still always start raining (or whatever) once I go past it. This may or may not be useful - if you want specifically to have just a timed sequence of weather that means that the player is encouraged to get a move on to ensure they're off a hill before a storm starts, then you would just put everything in a single timed chain. If you want to ensure that they always get a storm when they hit a hill, to make climbing the hill more challenging, then you want scripted control.
So let's take a look at the next sequence:
When you kick a weather sequence off using a LUA script command, it will "blend in" to the first weather type, and then remain there until that weather types "duration" is expired. At that point, it will "blend in" to the next weather type and so forth. Once it runs out of weather types it will refer to "loop" mode to find out what to do next. It will always blend from the state it's in, to the next one. If it's set to "stop" then it will take "blend out" minutes to then go back to the scenario standard weather pattern.
If a weather chain is currently running when you tell it to start another one, it will take "blend out" minutes to blend the existing weather chain out before beginning the next one.
This presents us with a big problem if we are in the middle of a foggy thunderstorm and then we switch to the next weather chain and it wants to then gently take us out of the thunderstorm - because the first thing that happens is the game will blend it out to whatever the default weather is and then blend back in to the new weather. In some cases this might be exactly what you're looking for, but in my case it wasn't - and that's why I had to add some extra weather types.
So we started the scenario with a nice sunny day, the we started "Rain" and over the course of a minute or so it started raining. Now we've hit the next marker and we want to go from "rain" to "foggyrain" without going back to "sunny". We set the "blend out time" of "rain" to be extremely short - so it will go back to sunny instantly, then the "Rain2" blueprint has a 0 minutes so it will instantly go back to raining again, which will last for about 6 seconds before it then begins a gentle fade over a minute or so towards foggy rain. This isn't ideal, it means that if you're looking, you'll notice a very tiny flash as the weather system goes back to sunny and then back to raining, however this can just as easily look like a lightning flash too - so I leave it to you to creatively decide whether you like that approach or not.
Let's look at the next chain:
The final chain, then, drops us back to Raining and then fades back to the sunny weather:
Once you've set it up, right click on the weather blueprint in the left hand pane (the one that looks like an Explorer folder tree) and select Export, followed by Export with References.
You should see some output in the lower pane and it should end by saying "==== Export Succeeded ====" - if it doesn't then go back and check. You should also see any error messages reported in that output window as well.
Script
Let's go back to our scenario script and see how we actually kick all these weather chains off, using the SysCall we talked about right at the start:function OnEvent(event) _G["OnEvent" .. event](); end function OnEventWeather1() SysCall("WeatherController:SetCurrentWeatherEventChain", "Rain"); end function OnEventWeather2() SysCall("WeatherController:SetCurrentWeatherEventChain", "FoggyRain"); end function OnEventWeather3() SysCall("WeatherController:SetCurrentWeatherEventChain", "FoggyDownpour"); end function OnEventWeather4() SysCall("WeatherController:SetCurrentWeatherEventChain", "Finish"); end
In the scenario i've set up a bunch of "stop at" instructions, each one with a minimum speed of 1mph (which turns them in to go-via instructions, but allows me to put a trigger on them). Here's an example of how I set one of them up:
Concluding Notes
I've set lots of blend timings quite low here because it allows for a more clear and obvious example, when developing your own I would suggest that you use short blend times to start with to allow you to more clearly see the result of each change. Once you've then got the right weather looking the way you want then you can dial up the blend times to get some splendid smooth transitions.I have not covered the "Location" events, this is where you can add lightning bolts in the sky, rainbows, audio for thunder claps and also flash the sky. I think this tutorial is definitely long enough for now, so i'll come back and do Location events in a future tutorial, perhaps once i've had some feedback on how people feel about this one.
When I set the blog up, it was intended to be only the most basic parts of scripting capable of accessing with the sole goal of enhancing scenarios. This is one of the most complex examples because it involves you going in to the blueprint editor, this is not going to be a problem for anyone familiar with content creation piplines in Train Simulator but for the average user I expect this to be something you go in to with some degree of trepidation. I hope that i've covered it with enough detail to show that it's not too hard and the results are clearly very well worth the effort.
What does it look like?
I'll leave you with some screenshots from my example scenario showing what it actually looks like in-game.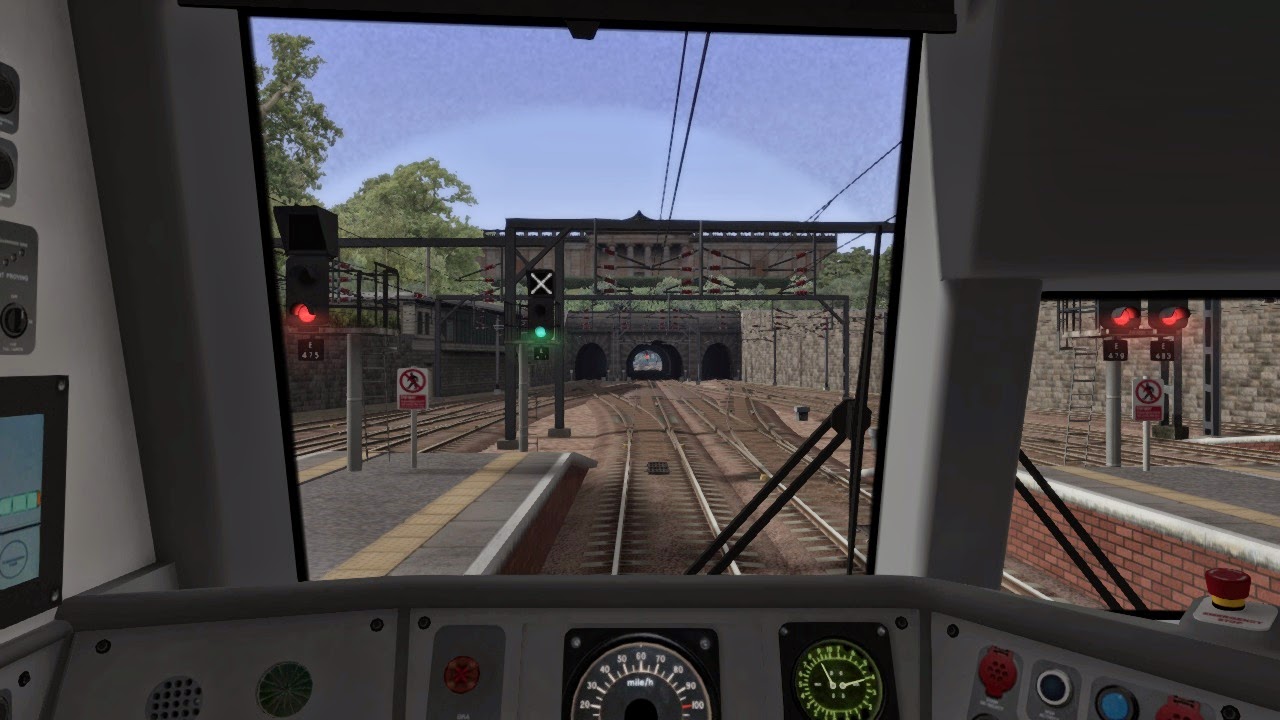 |
| Departing Edinburgh on a lovely sunny day, clear skies |
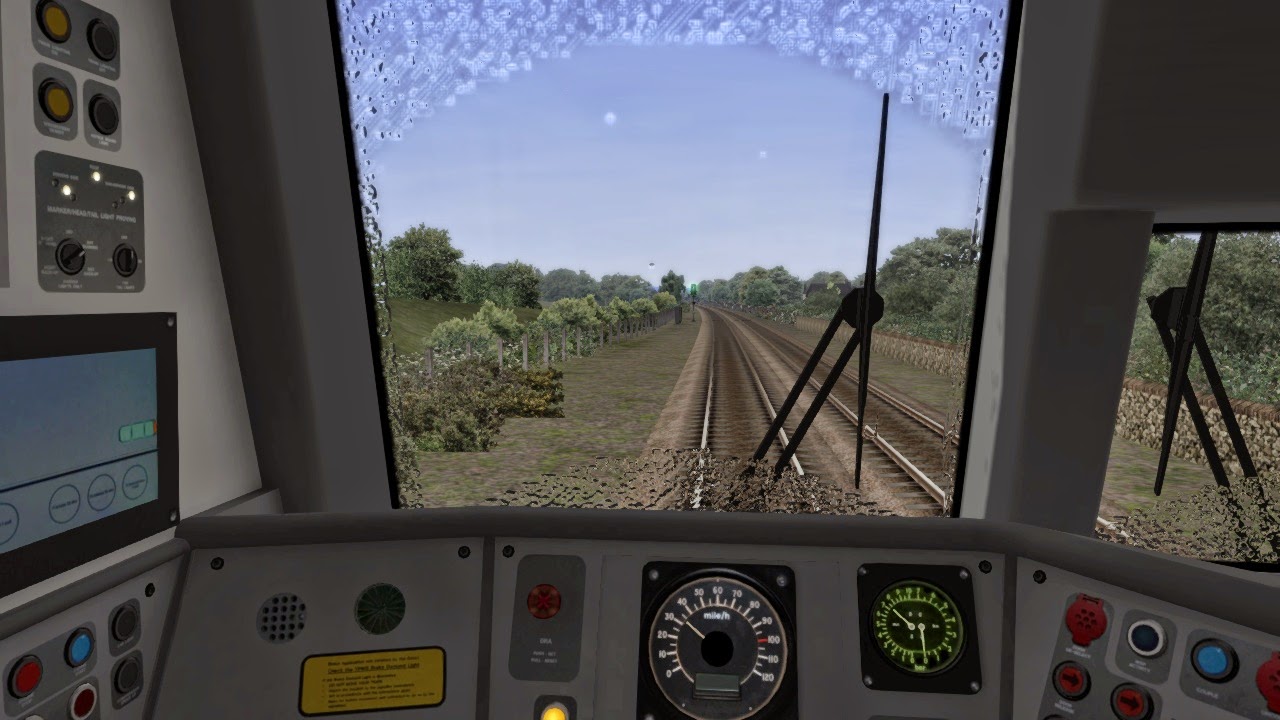 |
| As we went through Haymarket, rain started to appear |
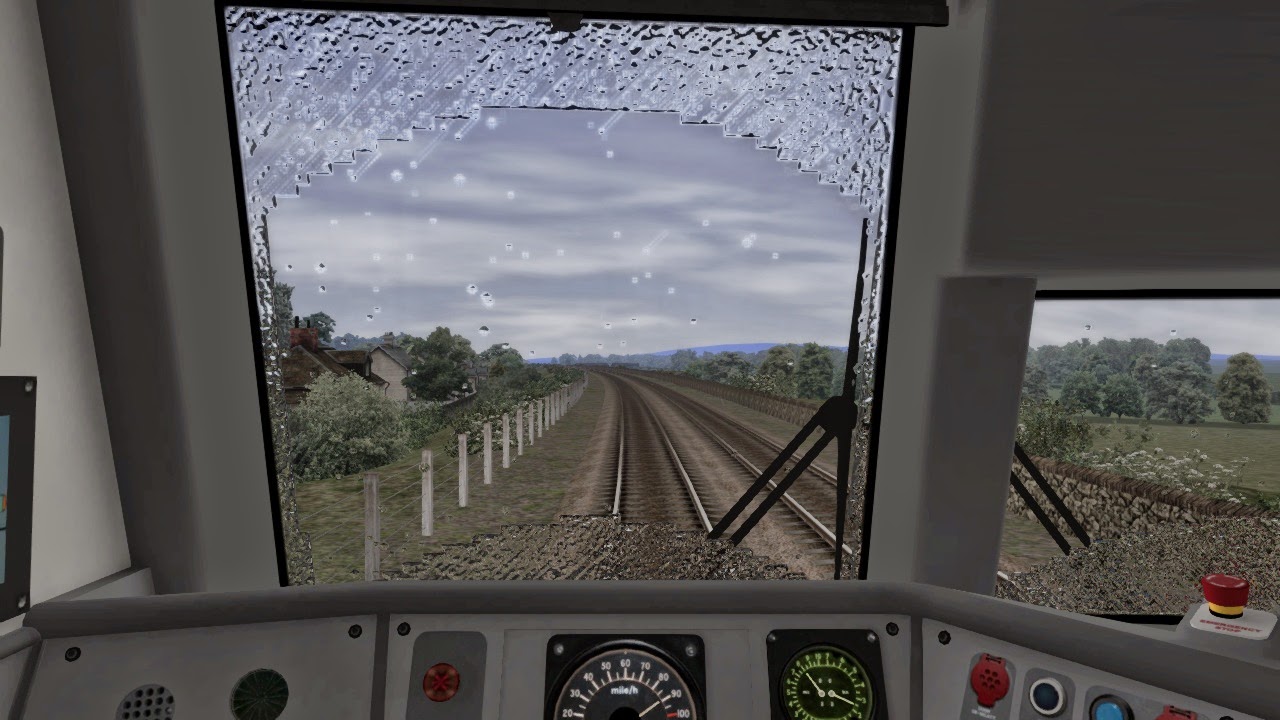 |
| The clouds seem to have taken a turn too, looks like we're in for a storm. |
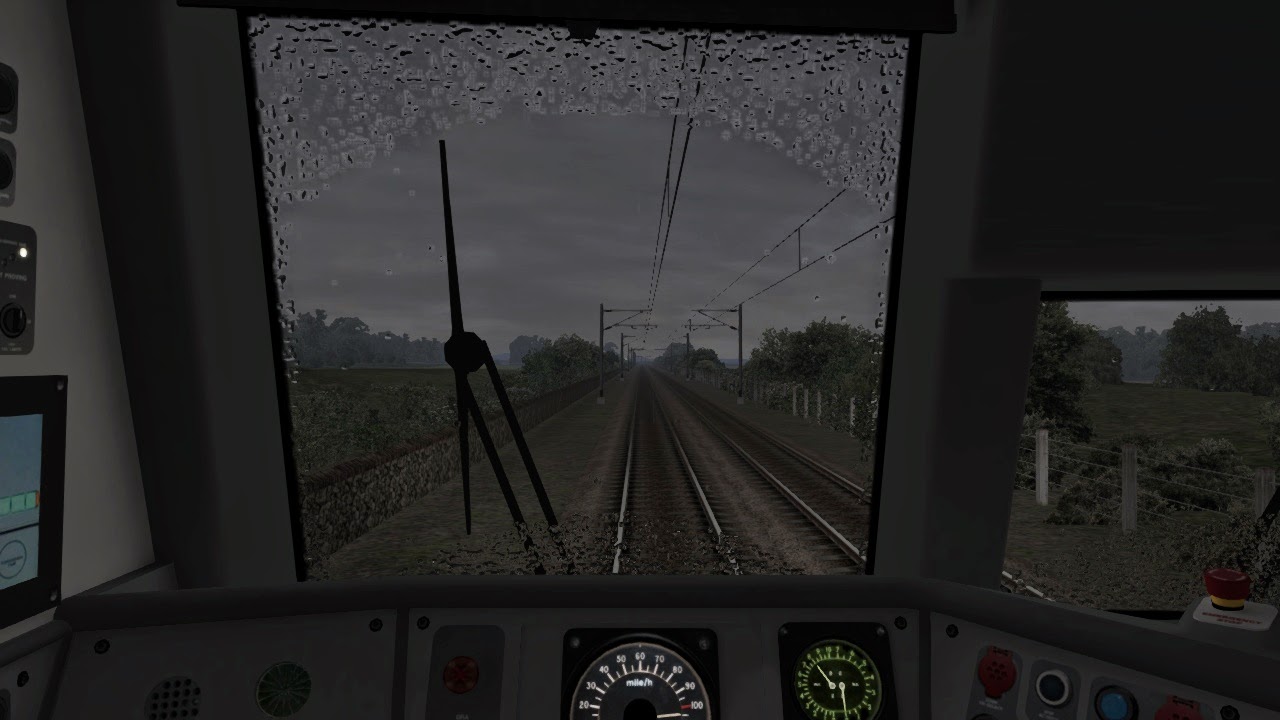 |
| Passing Edinburgh Park, the skies darken and the fog starts to draw in. |
 |
| The fog really seems to be closing in now after we pass Bathgate Junction and the rain is getting really itense, even with wipers on I can't keep up with the rain! |
 |
| Passing Winchburg the fog has lifted and the skies are lightening up, maybe we're through the storm. |
 |
| Heading towards our end point everything is brighter now and the rain is easing off. |
 |
| Finally, the skies are back to clear and there's just an odd spot or two appearing on the window! |
Subscribe to:
Comments (Atom)